You can follow the below steps to import or pipe emails from your personal Gmail account.
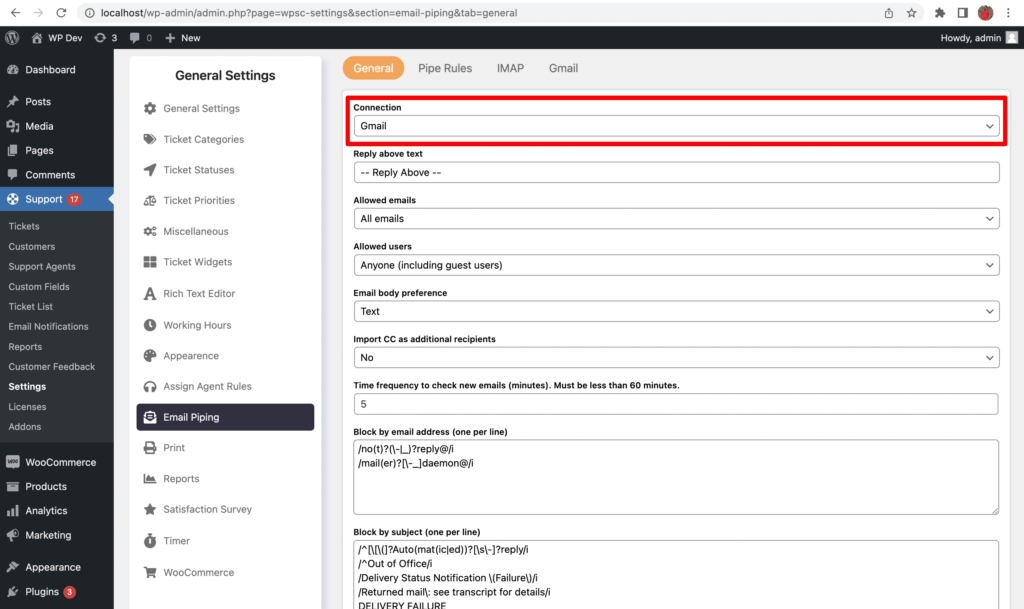
1. Set connection in general settings
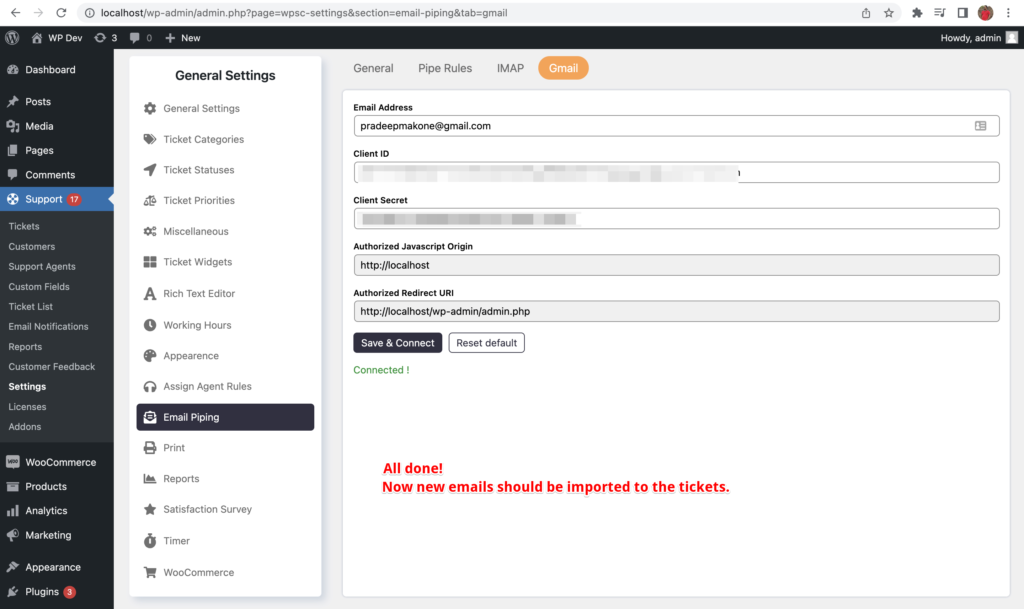
Set Gmail as a connection in Support → Settings → Email Piping → General, as shown in the below screenshot.
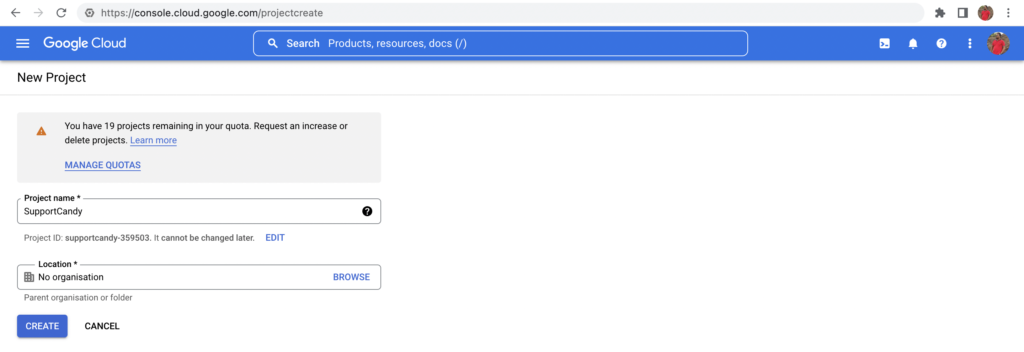
2. Create a Google Cloud Project
A Google Cloud project is required to use Google Workspace APIs. Click the link below to create and give the project a name. We will name it as SupportCandy.
https://console.cloud.google.com/projectcreate
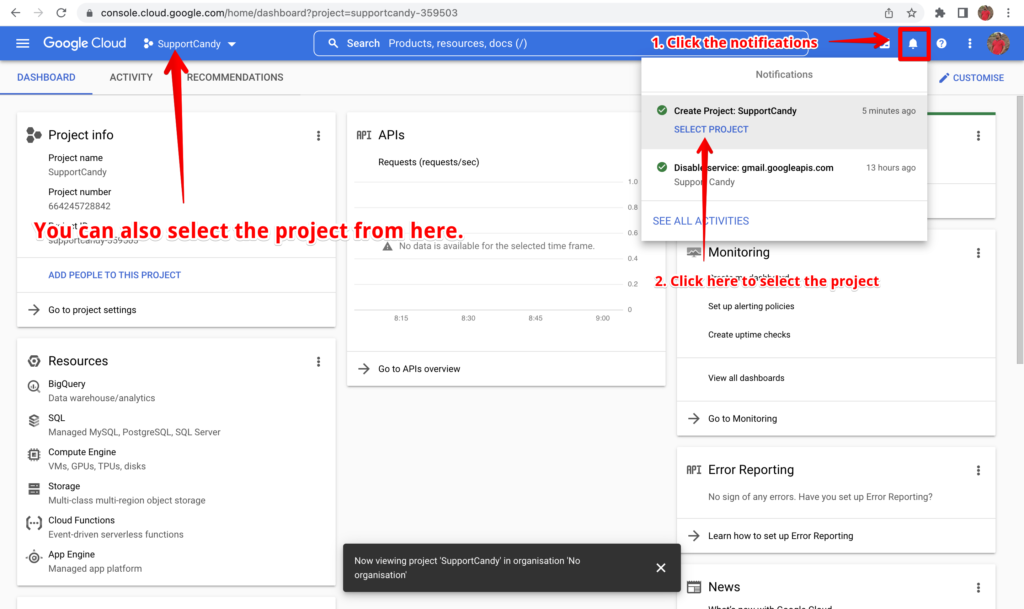
3. Select the project
After you press the Create button in the above step, it may take up to a few minutes for the project to be available for selection. Once it is ready, select the project shown in the screenshot below.
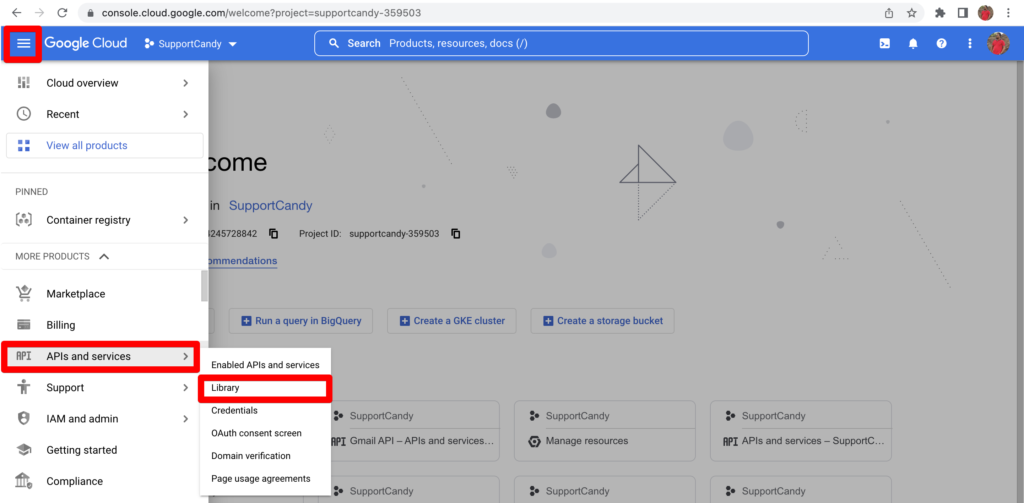
4. Enable Gmail APIs
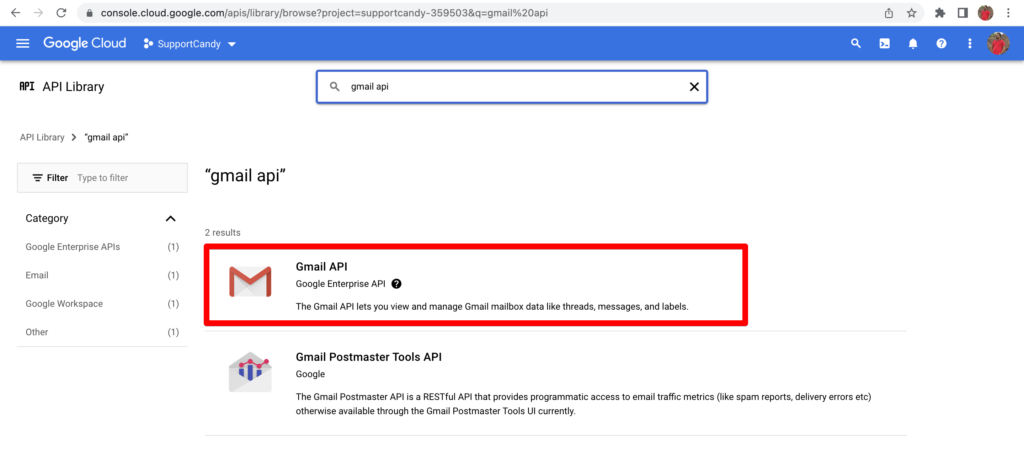
Click the Menu → APIs and services → Library
Search for “Gmail API” and click the result shown in the screenshot below.
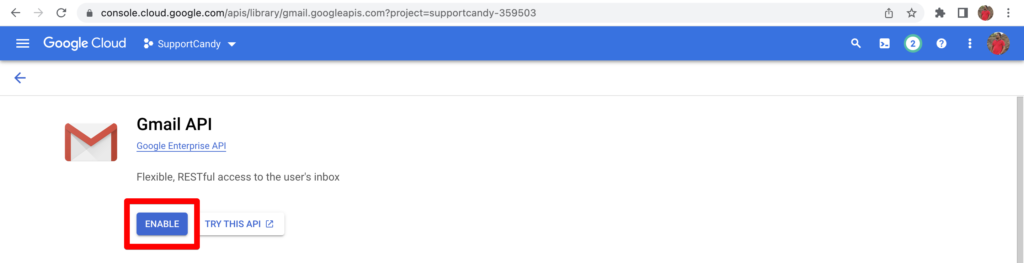
Click Enable to enable the Gmail APIs, as shown in the below screenshot.
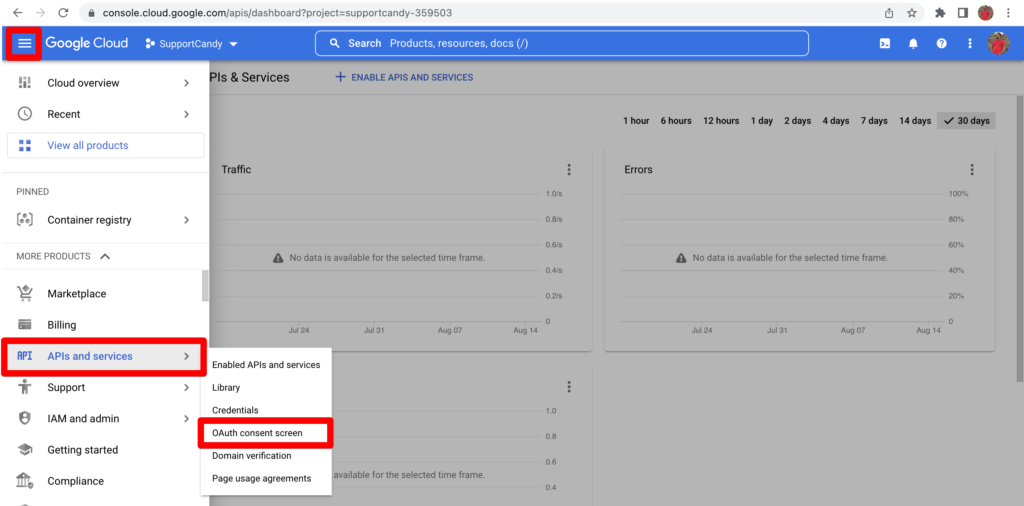
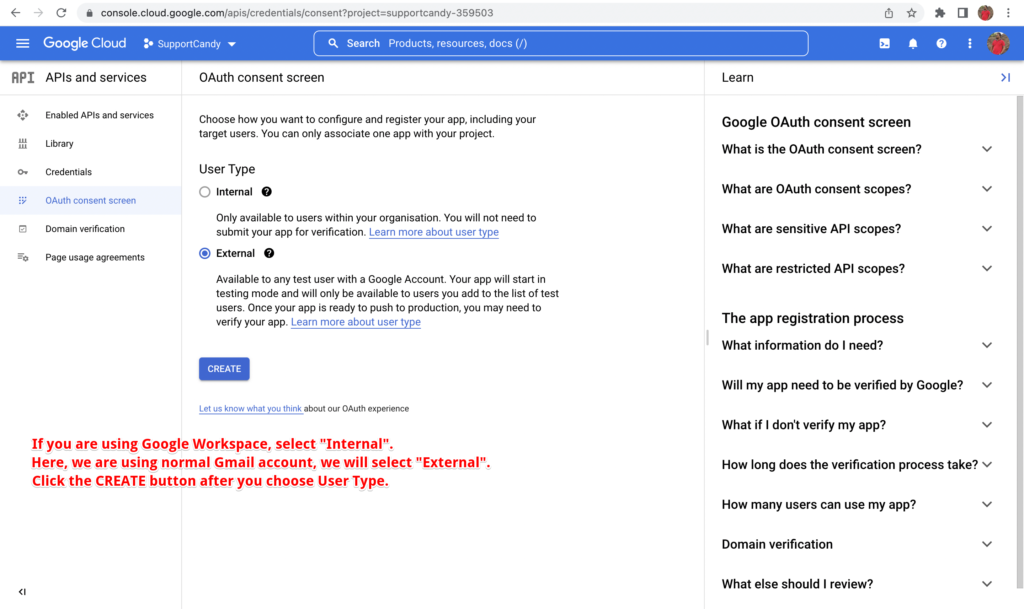
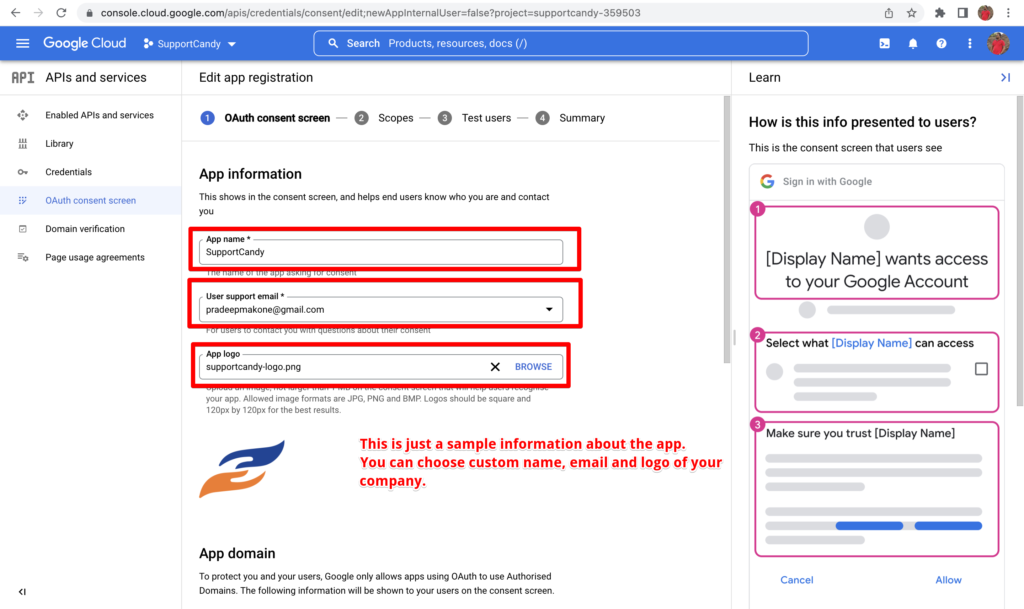
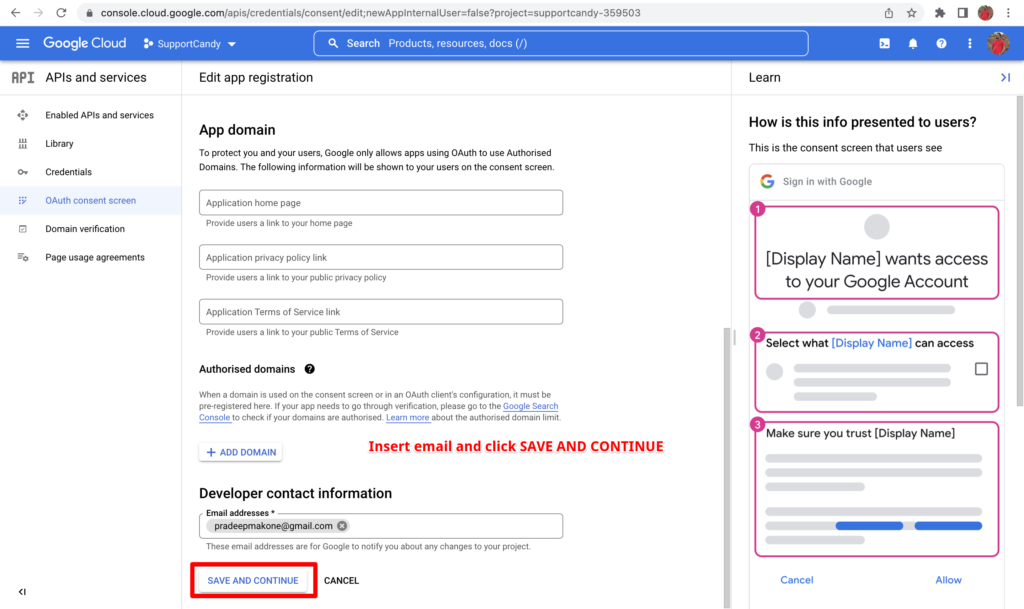
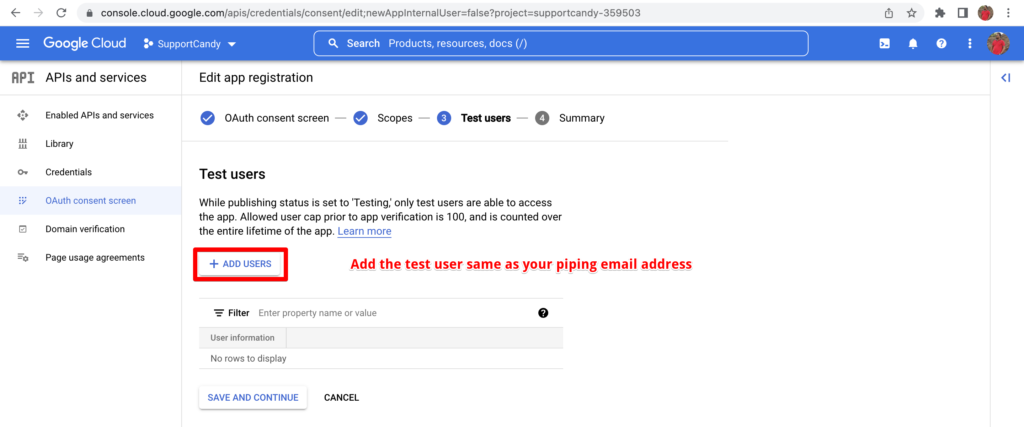
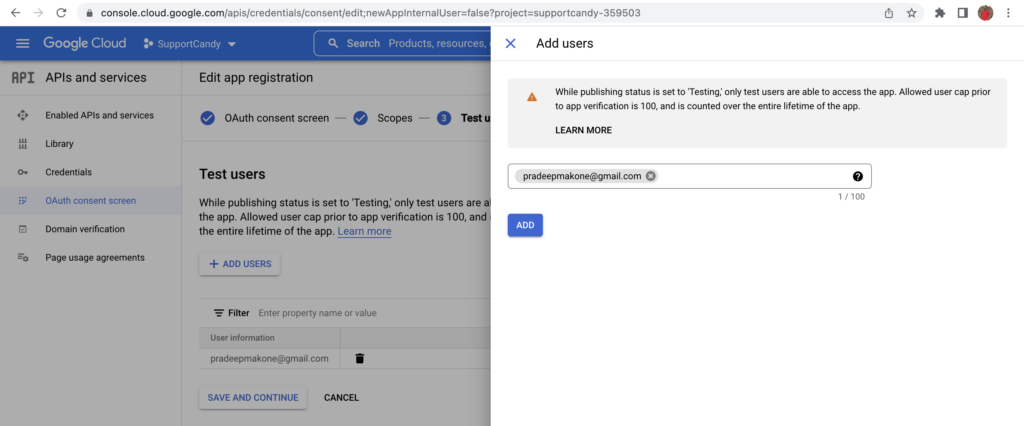
5. Setup OAuth consent screen
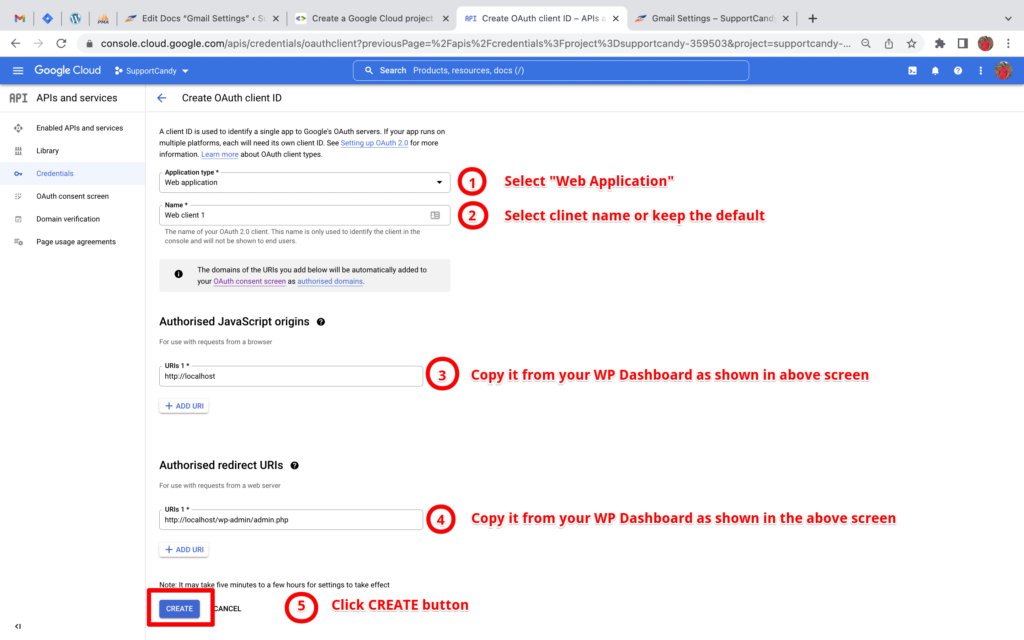
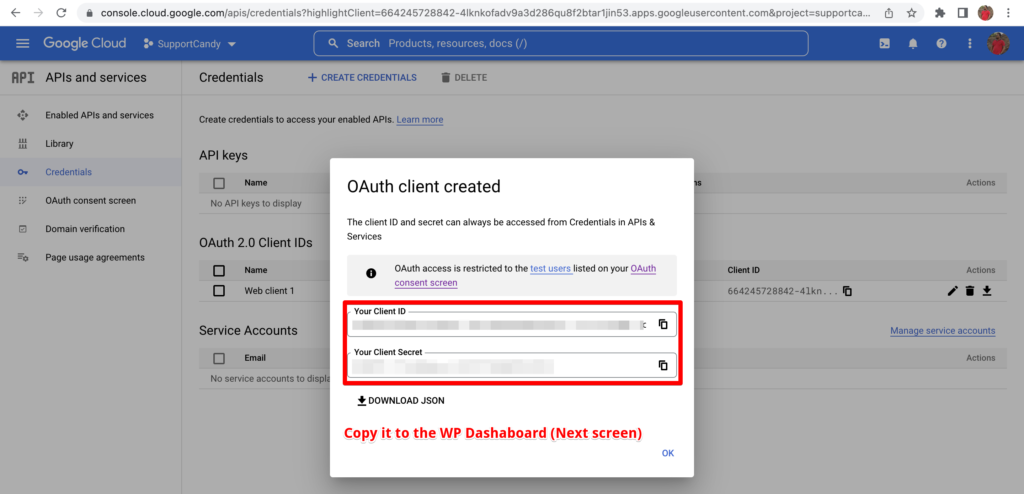
6. Create new credentials


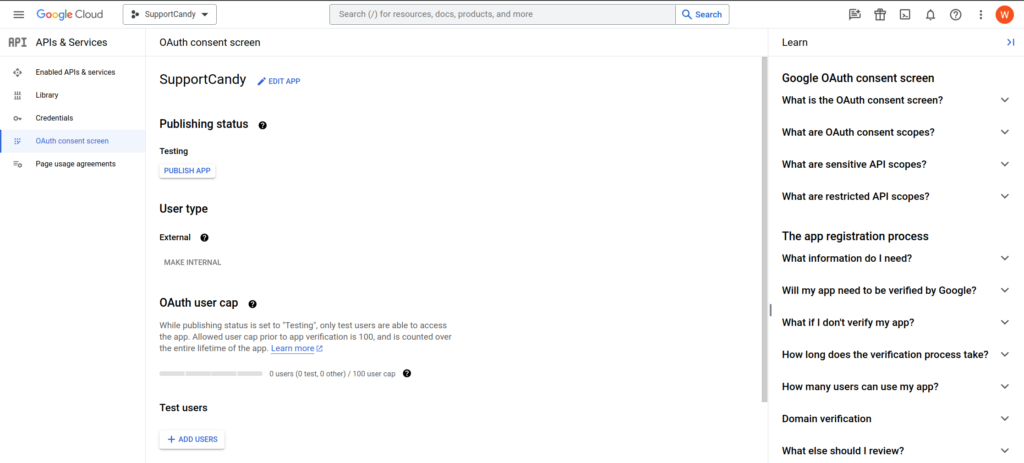
Publish the App
Now go to the OAuth Consent Screen section and click on the Publish App button.
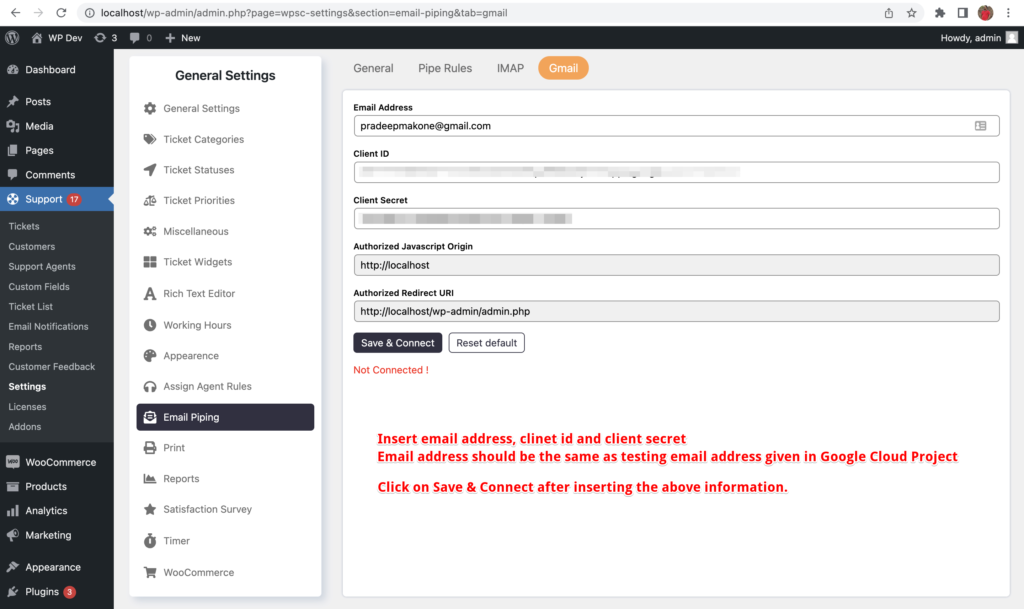
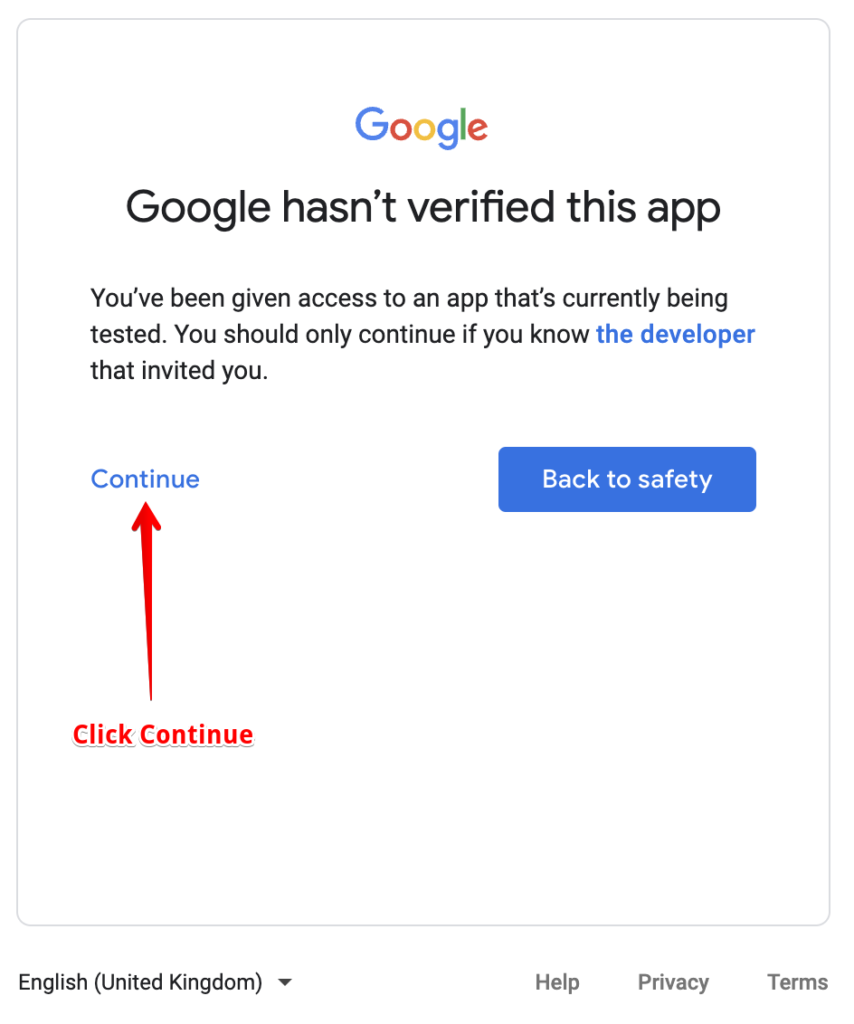
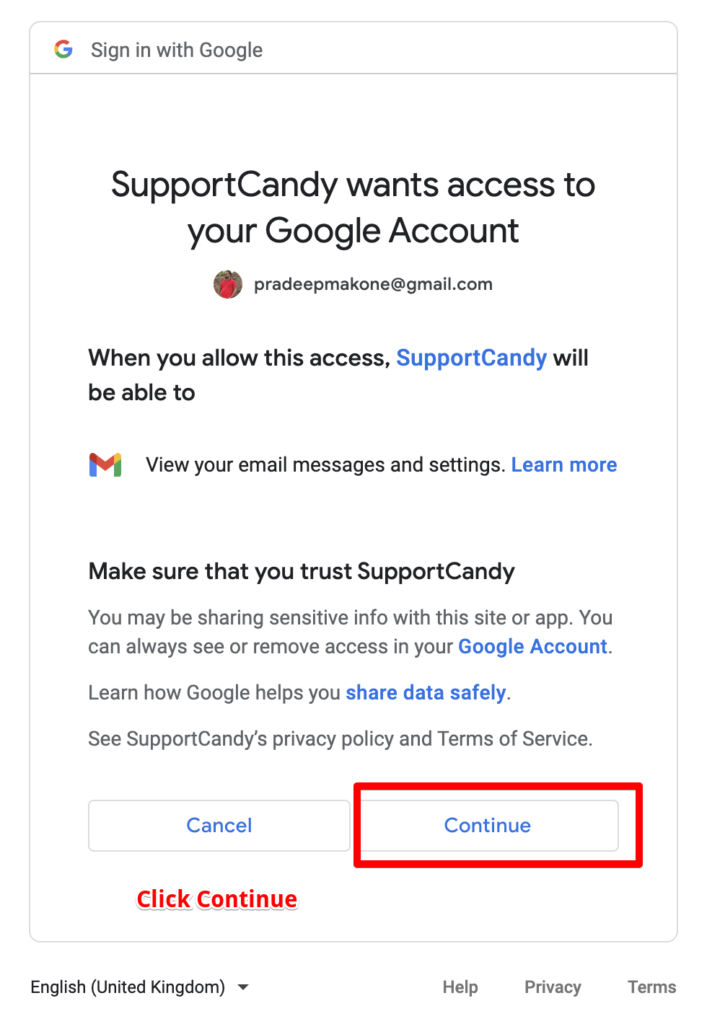
7. Connect to the Gmail APIs
8. Real-time CRON setup
WordPress CRON is not reliable for consistent email piping. It only gets executed when you have the visitor on the website. You can follow the below link if you haven’t set up real-time CRON for your WordPress website.
https://www.hostgator.com/help/article/how-to-replace-wordpress-cron-with-a-real-cron-job