
Overview
The SupportCandy Dashboard provides support agents with a centralized view of ticket activity and key support metrics. It helps agents monitor their workload, identify high-priority tickets, and track support performance.
The dashboard is available only to support agents and can be accessed from both the WordPress Dashboard and the SupportCandy front-end portal.
Where to Find
Dashboard settings: SupportCandy → Settings → Dashboard
Agent role access: SupportCandy → Support Agents → Agent Roles
How It Works
The SupportCandy Dashboard displays widgets that provide real-time information about tickets and support activities.
Administrators can control:
- Which agent roles can access the dashboard.
- Which dashboard widgets are displayed.
- The default reporting period.
- Which recent activities appear.
- Whether the dashboard refreshes automatically.
This allows each organization to customize the dashboard based on its support workflow.
Key Dashboard Features
Comprehensive Ticket Overview
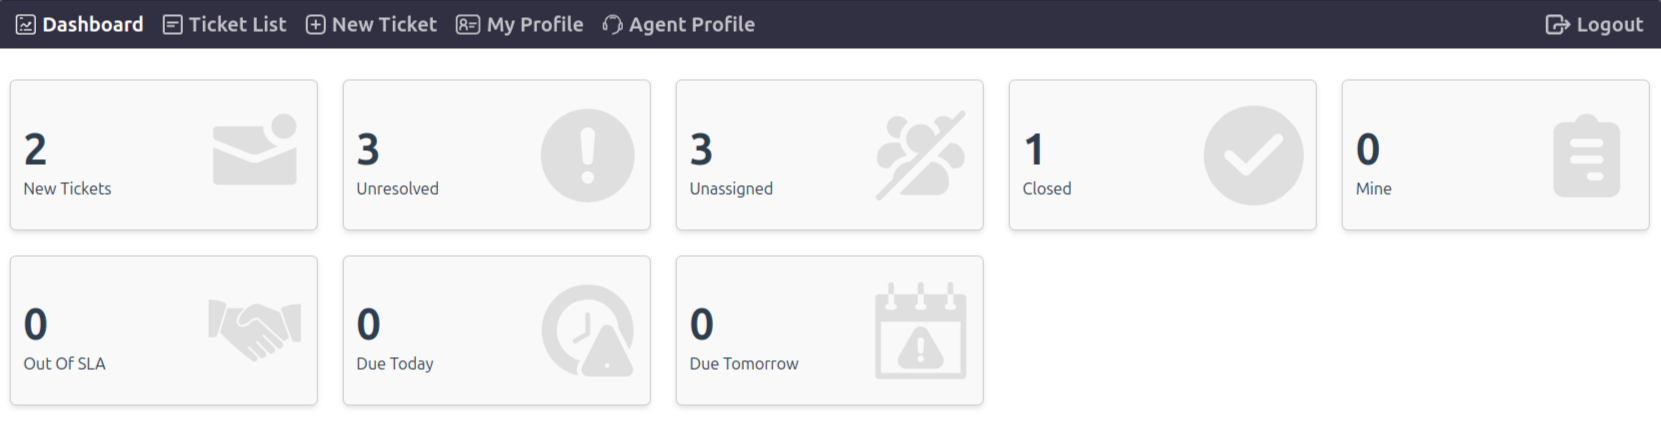
Quickly monitor important ticket categories, including:
- Open Tickets
- Unresolved Tickets
- Unassigned Tickets
- Closed Tickets
These metrics help agents understand their current workload and prioritize pending tickets.
SLA Tracking
Track tickets based on their Service Level Agreement (SLA), including:
- Out of SLA
- Due Today
- Due Tomorrow
This helps agents identify tickets that require immediate attention.
Agent-Only Access
The SupportCandy Dashboard is available only to support agents. Customers cannot access the dashboard.
Agents can access the dashboard from:
- WordPress Dashboard
- SupportCandy Front-end Portal
Step-by-Step Guide
Enable Dashboard Access
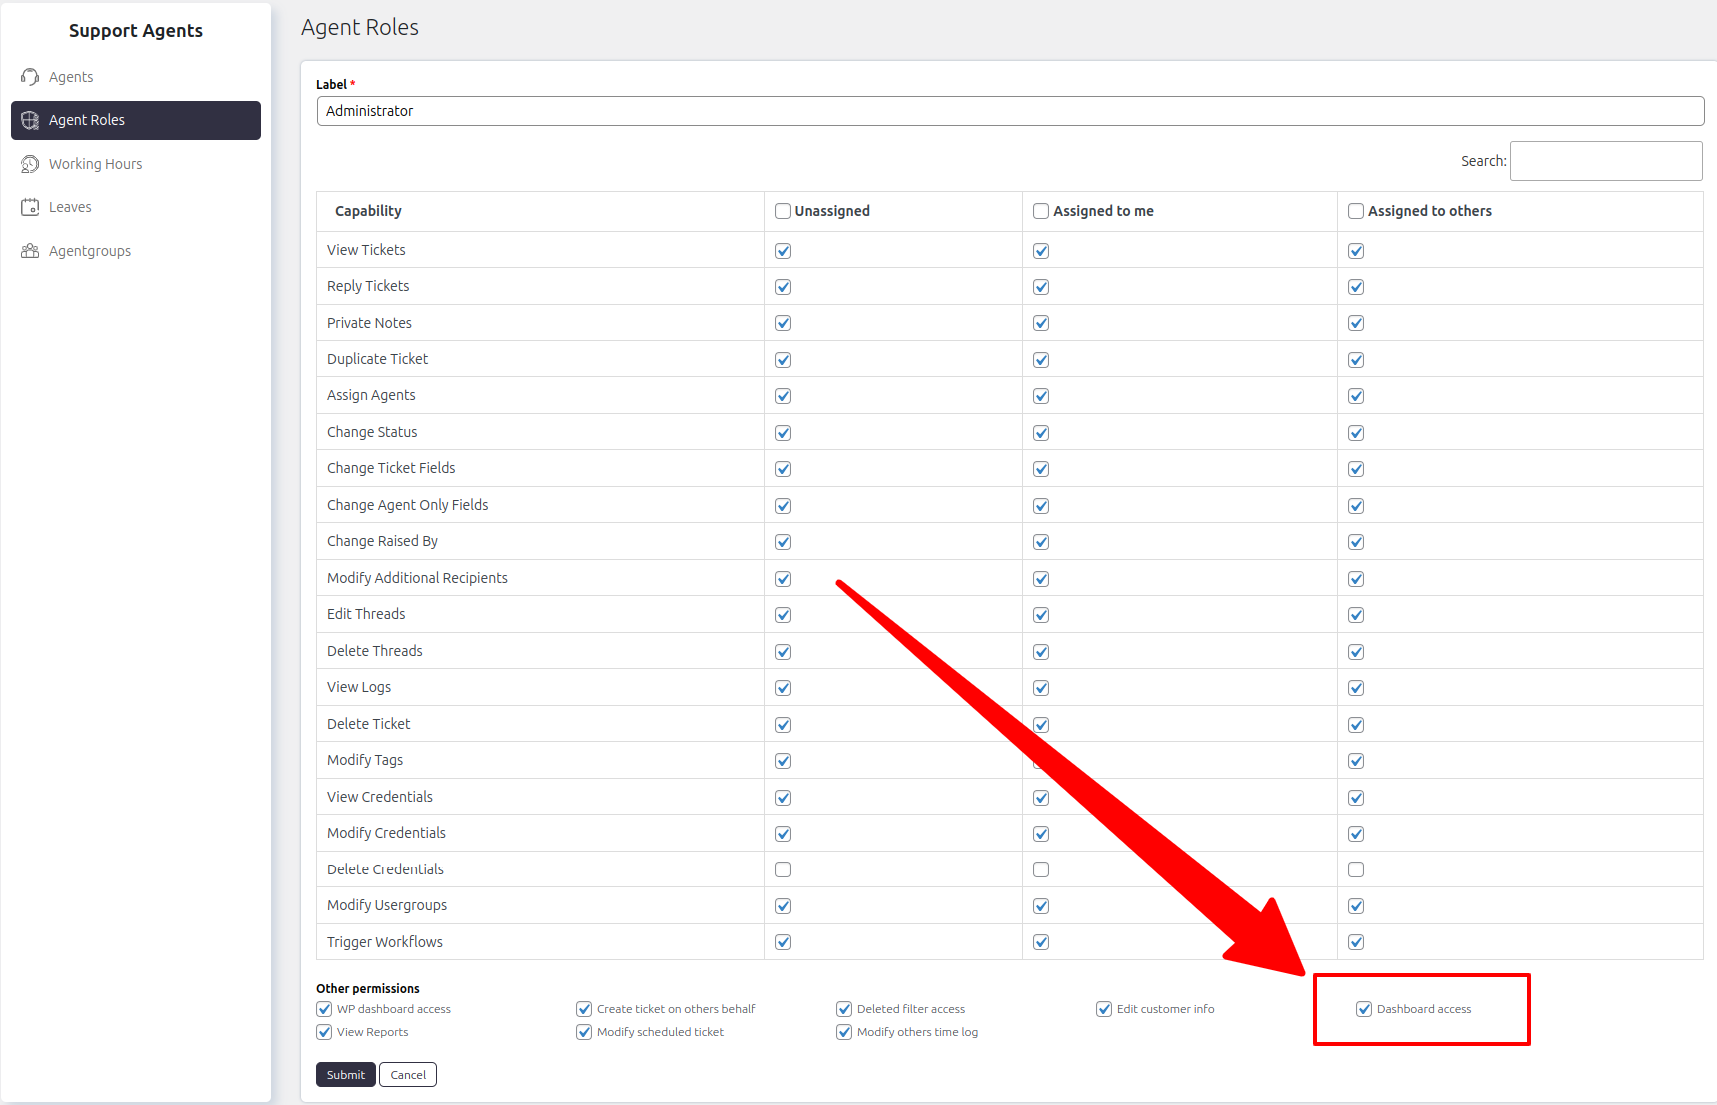
- Go to SupportCandy → Support Agents → Agent Roles.
- Edit the required Agent Role.
- Enable the Dashboard Access permission.
- Click Save.
Configure Dashboard Widgets
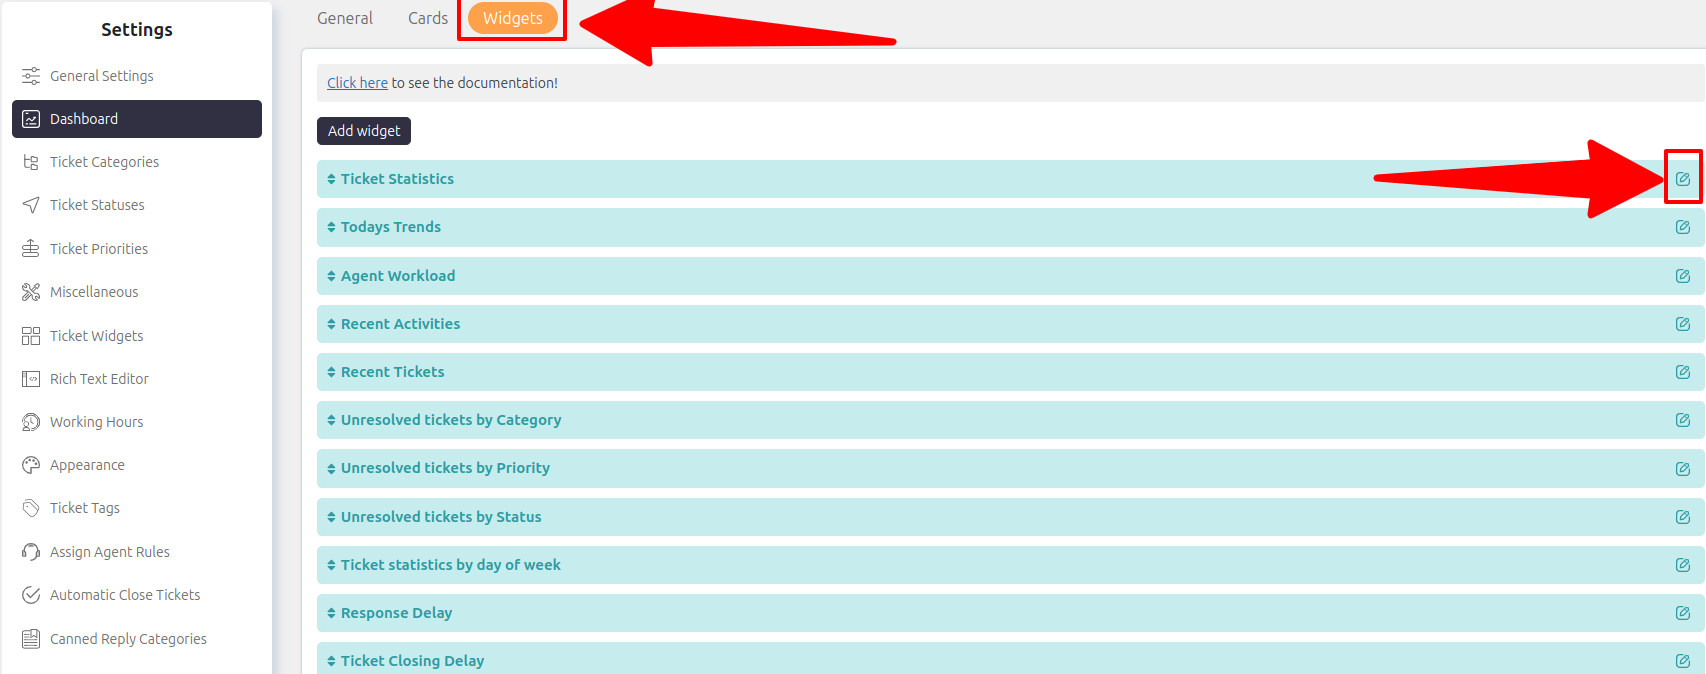
- Go to SupportCandy → Settings → Dashboard → Widgets.
- Edit the widget you want to configure.
- Select the Allowed Agent Roles.
- Save your changes.
Set the Default Date Range
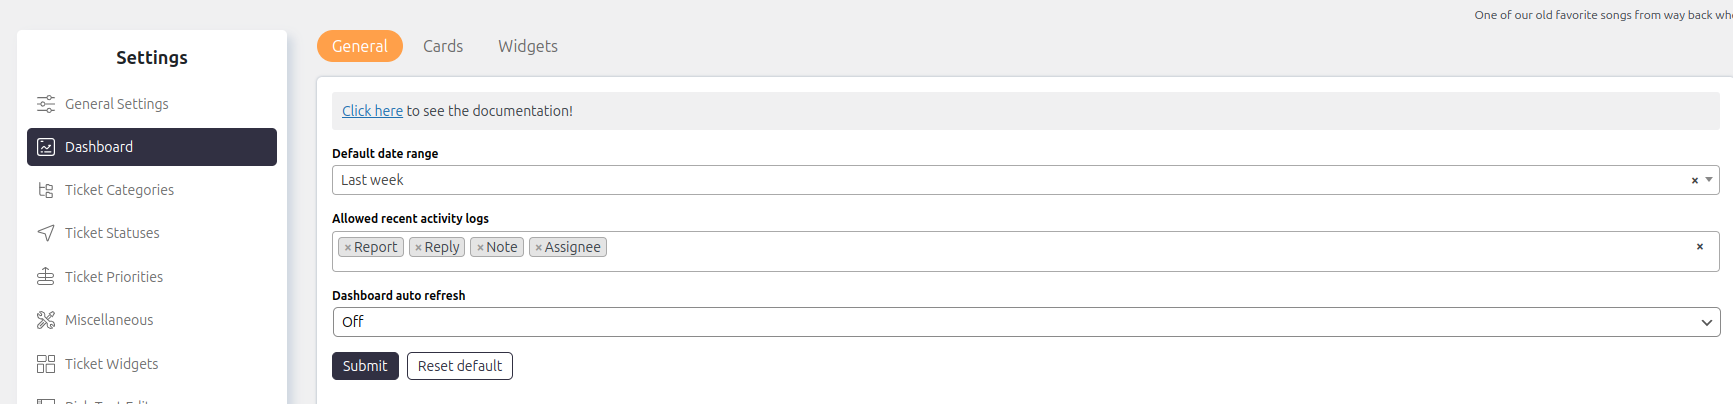
- Go to SupportCandy → Settings → Dashboard → General.
- Locate Default Date Range.
- Select the desired reporting period.
- Click Submit.
Configure Recent Activity
- Go to SupportCandy → Settings → Dashboard → General.
- Locate Allowed Recent Activity Logs.
- Enable or disable the activity types you want to display.
- Click Submit.
Enable Auto-Refresh
- Go to SupportCandy → Settings → Dashboard → General.
- Enable or disable Auto-Refresh.
- Click Submit.
Options / Settings
Dashboard Access: Allows agents with the selected Agent Role to access the SupportCandy Dashboard.
Allowed Agent Roles: Controls which agent roles can view each dashboard widget.
Default Date Range: Sets the default reporting period used by dashboard widgets.
Choose the option that best matches your reporting requirements, such as:
- Daily
- Weekly
- Monthly
Allowed Recent Activity Logs
Determines which activities are displayed in the Recent Activity widget.
Examples include:
- New Tickets
- Ticket Assignments
- Status Changes
Enable Auto-Refresh
Automatically refreshes dashboard data so agents always see the latest ticket information.
Example
Suppose your support team has both Support Agents and Support Managers.
You can grant Dashboard Access to both roles while configuring widget visibility differently. Managers can view reporting and performance widgets, while agents see only ticket workload and recent activity widgets relevant to their daily tasks.
Notes / Tips
- The SupportCandy Dashboard is available only to support agents.
- Customers cannot access the dashboard.
- Configure widget visibility to show only relevant information for each agent role.
- Enable Auto-Refresh if your team handles a high volume of tickets and needs live updates.
- Review dashboard permissions whenever you create or modify an Agent Role.