Overview
SupportCandy uses WordPress pages to display its support features on the front end. You can create separate pages for your complete support portal, ticket creation form, or ticket lookup page using SupportCandy shortcodes.
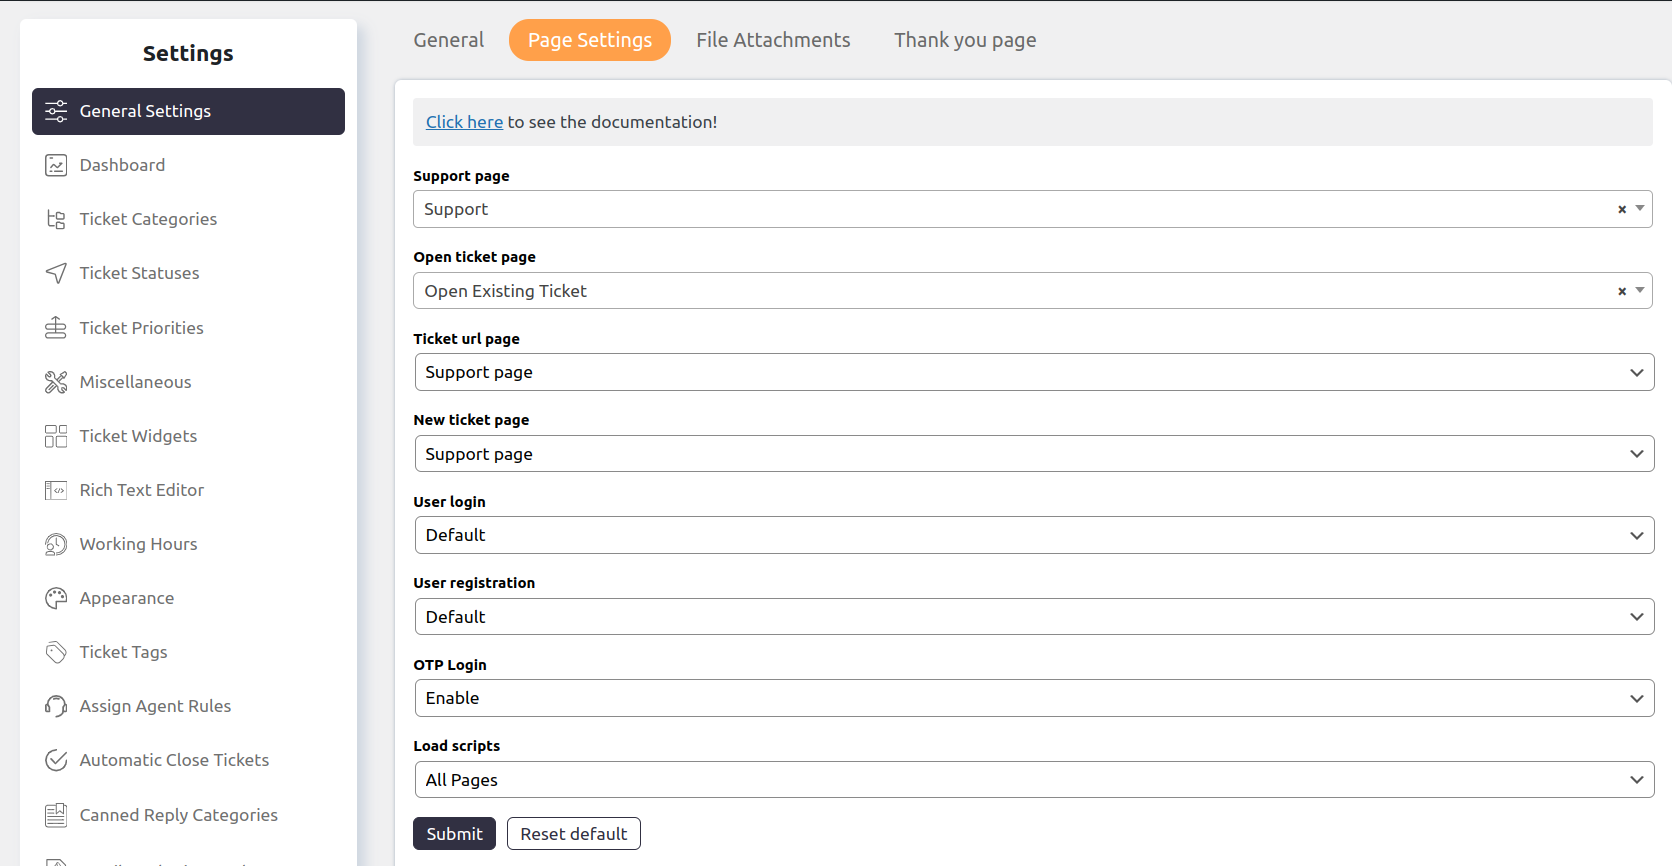
Support Page
The Support Page provides the complete SupportCandy experience. Depending on your settings, it can include:
- User login
- User registration
- Password reset
- Open ticket using OTP
- Guest login
- Guest ticket creation
- Create new ticket form
- Ticket list and ticket details
Steps to Configure
- Go to Pages → Add New.
- Create a new page (for example, Support).
- Add the following shortcode to the page:
[supportcandy] - Publish the page.
- Go to SupportCandy → Settings → General Settings → Page Settings.
- Select the newly created page from the Support Page dropdown.
- Click Submit to save the changes.
Open Ticket Page
The Open Ticket Page allows customers to open a ticket directly by entering their Ticket ID. This page is useful if you do not want to display the ticket list on the front end.
Steps to Configure
- Go to Pages → Add New.
- Create a new page (for example, Open Ticket).
- Add the following shortcode to the page:
[wpsc_open_ticket] - Publish the page.
- Go to SupportCandy → Settings → General Settings → Page Settings.
- Select the newly created page from the Open Ticket Page dropdown.
- Click Submit to save the changes.
New Ticket Page
The New Ticket Page displays only the ticket creation form. It is useful if you want to use SupportCandy as a contact form or allow customers to submit new tickets without accessing their ticket list.
Steps to Configure
- Go to Pages → Add New.
- Create a new page (for example, Create New Ticket).
- Add the following shortcode to the page:
[wpsc_create_ticket] - Publish the page.
- Copy the URL of the newly created page.
- Go to SupportCandy → Settings → General Settings → Page Settings.
- Change the New Ticket Page option from Support Page to Custom.
- Paste the page URL into the Custom Page URL field.
- Click Submit to save the changes.
SupportCandy Shortcodes
| Shortcode | Purpose |
|---|---|
[supportcandy] |
Displays the complete SupportCandy support portal. |
[wpsc_create_ticket] |
Displays only the new ticket creation form. |
[wpsc_open_ticket] |
Allows customers to open a ticket using their Ticket ID. |