
Overview
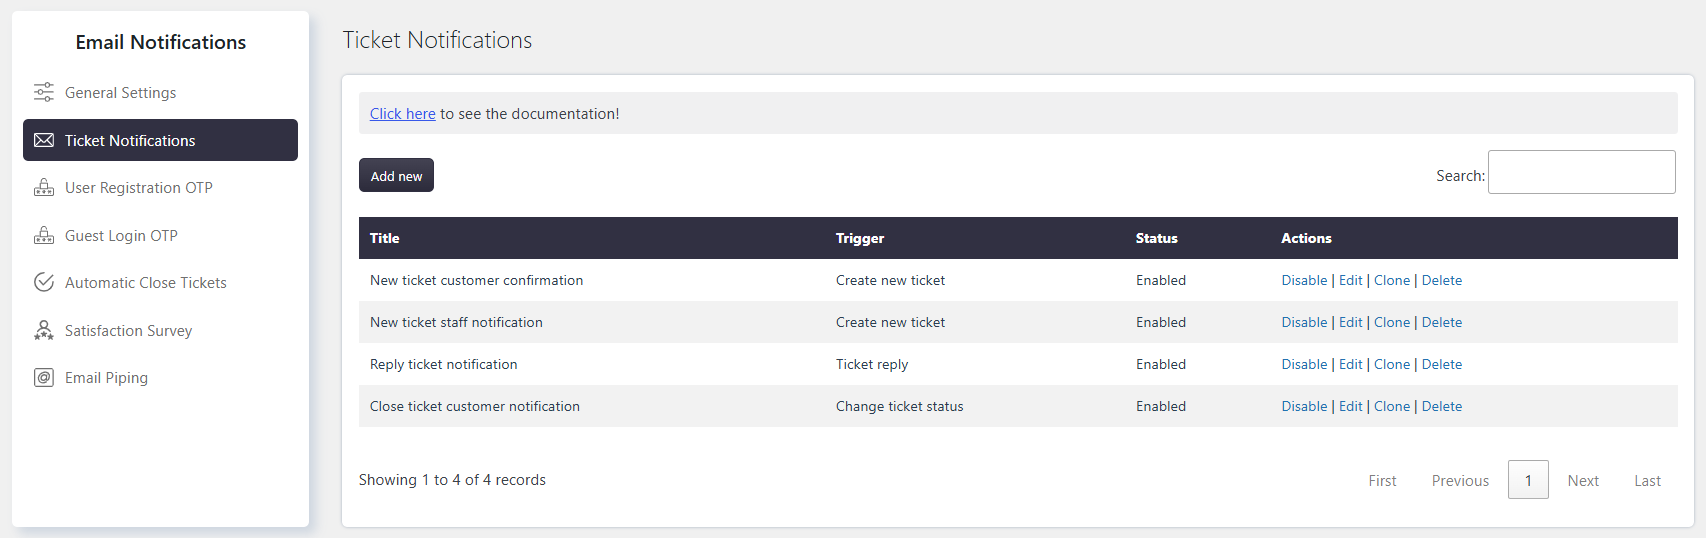
Ticket Notifications allow you to configure email templates for different ticket events.
Each notification can include dynamic ticket information using Macros. You can also define recipients using To, CC, and BCC.
Where to Find
Go to Support → Email Notifications → Ticket notifications.
How It Works
SupportCandy sends an email notification when a configured ticket event occurs.
You can create and customize the email template for each event. The notification must have Notification Status set to Enabled for emails to be sent.
Some add-ons may add additional ticket events. These events are documented separately in the respective add-on documentation.
Step-by-Step Guide
- Go to Support → Email Notifications → Ticket notifications.
- Select the ticket event you want to configure.
- Set Notification Status to Enabled.
- Configure the email Subject and Body.
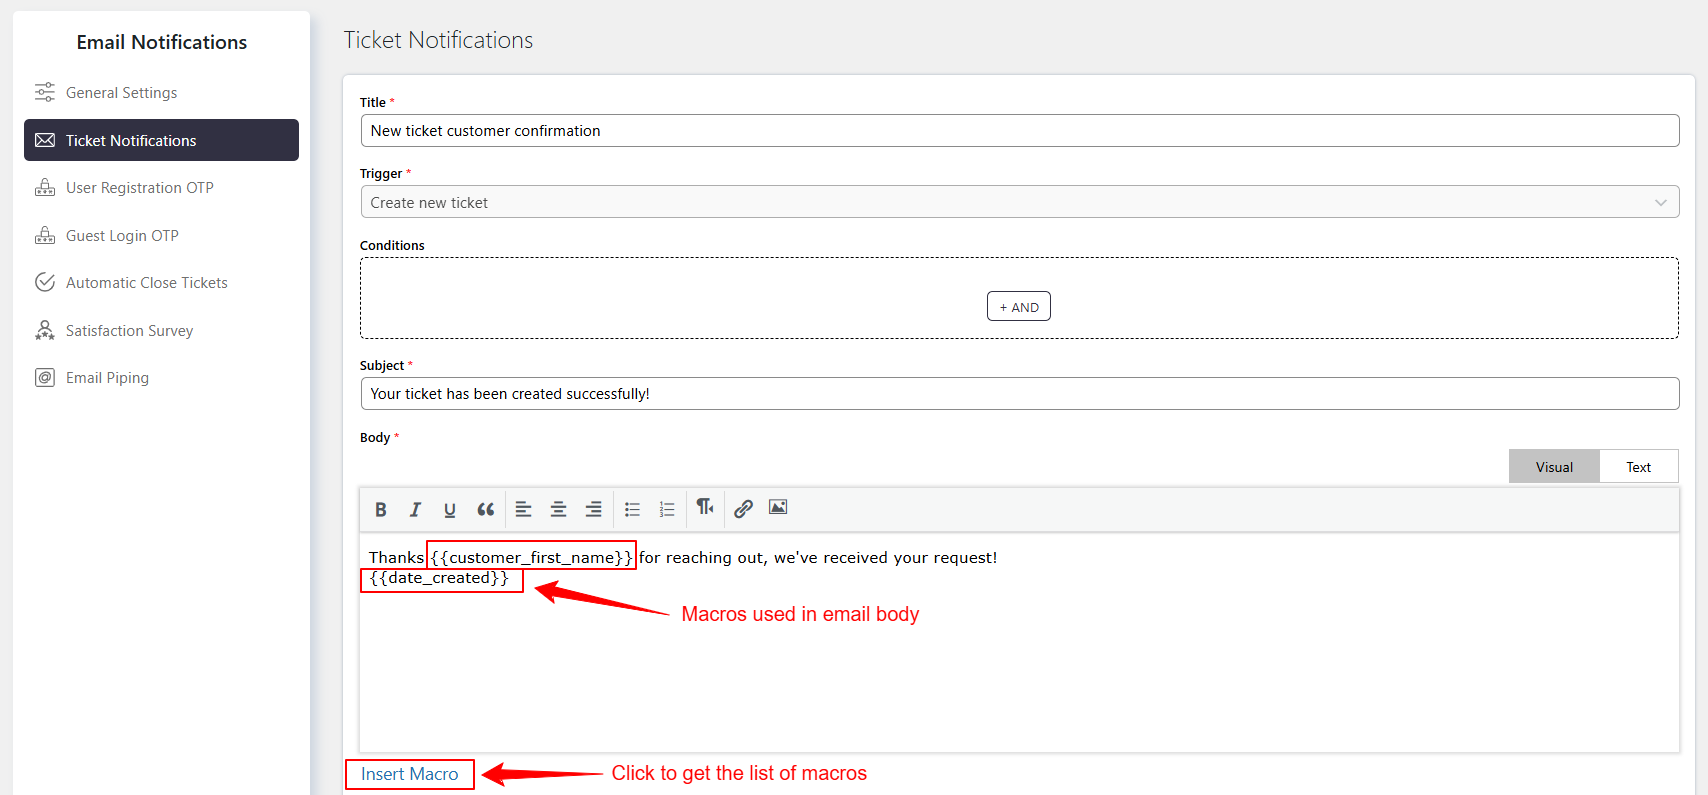
- Use Macros to insert dynamic ticket information.
- Configure recipients in To, CC, and BCC.
- Select recipients from the available recipient categories or add custom email addresses.
- Save the notification settings.
Options / Settings
Configurable Ticket Events
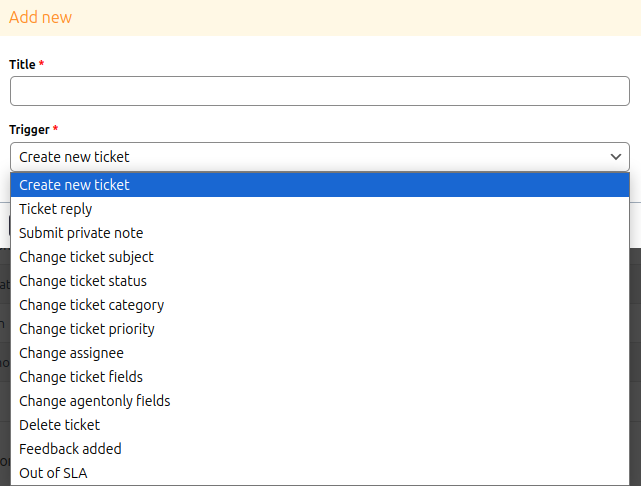
You can create and customize notifications for the following ticket events:
- Create New Ticket – Triggered when a new ticket is created.
- Ticket Reply – Triggered when a reply is added to the ticket.
- Change Ticket Status – Triggered when the ticket status changes.
- Change Ticket Category – Triggered when the ticket category is updated.
- Change Ticket Priority – Triggered when the ticket priority changes.
- Change Assignee – Triggered when the ticket is reassigned to another Agent.
- Change Ticket Subject – Triggered when the ticket subject is updated.
- Change Ticket Fields – Triggered when standard or custom ticket fields are modified.
- Change Agent-Only Fields – Triggered when Agent-only fields are updated.
- Submit Private Note – Triggered when a private note is added to the ticket.
- Feedback Added – Triggered when customer feedback is submitted for a ticket.
- Out of SLA – Triggered when a ticket breaches the Service Level Agreement (SLA).
- Delete Ticket – Triggered when a ticket is deleted.
Notification Status
Using Macros in Templates
Macros are placeholders that dynamically insert ticket information into the email Subject and Body.
For example, a Macro can insert information such as:
- Ticket ID
- Customer name
- Assigned Agent details
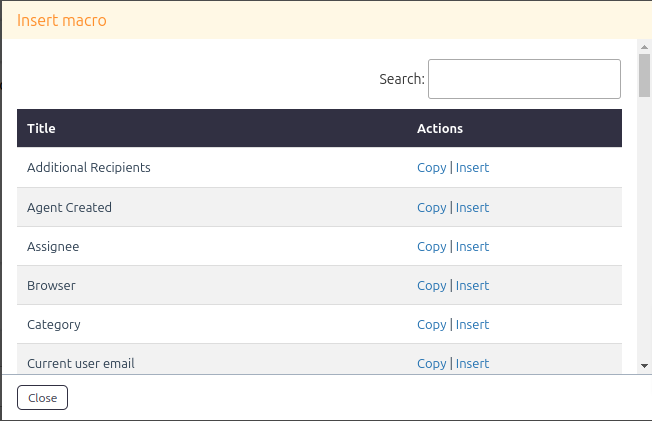
You can find the complete list of available macros, along with more information about each macro, on the following page:
Recipient Options
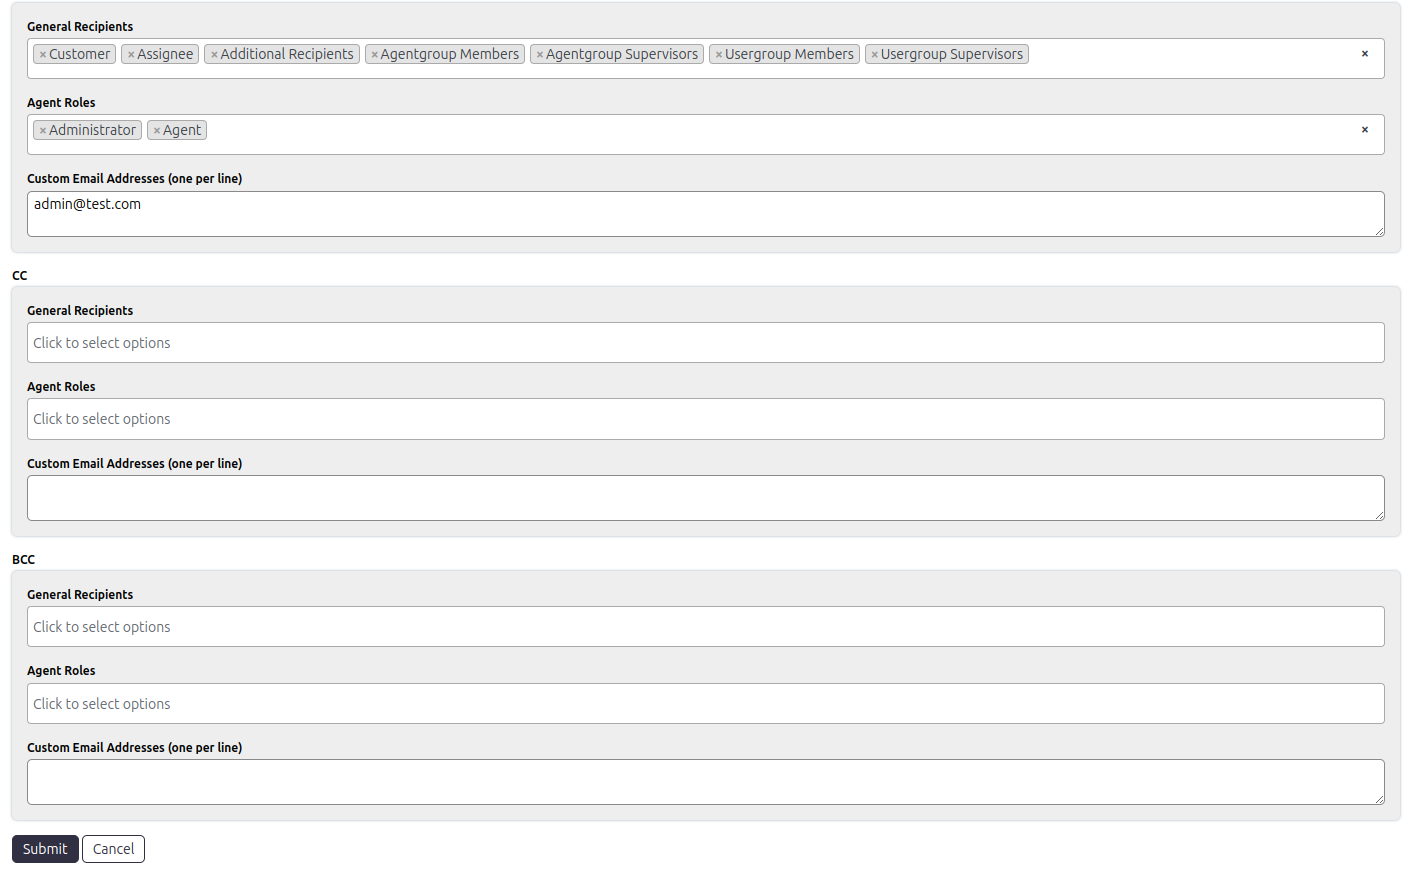
General Recipients
- Customer – The user who raised the ticket.
- Assignee – The Agent assigned to the ticket.
- Additional Recipients – Additional email addresses added to the ticket.
- Current User – The user performing the action. If this recipient is not selected, the Current User will not receive the notification even when other recipients are configured.
- Agent Group Members – All Agents in the assigned Agent group.
- Agent Group Supervisors – Supervisors of the assigned Agent group.
- User Group Members – All users in the assigned User group.
- User Group Supervisors – Supervisors of the assigned User group.
Agent Roles
- Administrator – Agents with the Administrator role.
- Agent – Agents with the standard Agent role.
- Other Agent roles can be configured based on the system settings or role customization.
Custom Recipients
- Custom Email Addresses – Manually specified email addresses. Enter one email address per line.
Notification Configuration Fields
Each notification provides the following recipient fields:
- To – The main recipients who receive the notification.
- CC – Additional recipients who receive a copy of the notification.
- BCC – Recipients who receive the notification without their email addresses being visible to other recipients.
You can select recipients from General Recipients, Agent Roles, or Custom Recipients in all three fields.
Example
To notify the customer and assigned Agent when a new ticket is created:
- Open the Create New Ticket notification.
- Set Notification Status to Enabled.
- Select Customer in To.
- Select Assignee in CC.
- Add the required ticket information using Macros.
- Save the notification.
When a new ticket is created, the configured recipients receive the notification.
Notes / Tips
- Set Notification Status to Enabled before expecting notifications.
- Use Macros when ticket information needs to be inserted dynamically.
- Use To for the main recipients of a notification.
- Use CC when additional recipients should receive a visible copy.
- Use BCC when recipients should not see other BCC email addresses.
- Enter one email address per line when using Custom Email Addresses.
- Additional ticket events may be available through add-ons. Check the relevant add-on documentation for details.