
Overview
Ticket Form Fields determine which fields are displayed on the New Ticket form. You can arrange the form to collect the information your support team needs from customers when they submit a ticket.
This section allows you to add and configure existing Ticket Fields and Customer Fields. To create a new custom field, you must first create it in Ticket Fields.
Important: The Name and Email fields are mandatory and cannot be removed from the ticket form.
Where to Find
How It Works
The Ticket Form is built using existing fields from Ticket Fields and Customer Fields. When you add a field to the form, you can configure its display order, width, whether it is required, and when it should be displayed.
This allows you to create a ticket form that collects only the information relevant to your support process.
Step-by-Step Guide
- Go to Support → Custom Fields → Ticket Form Fields.
- Click Add New.
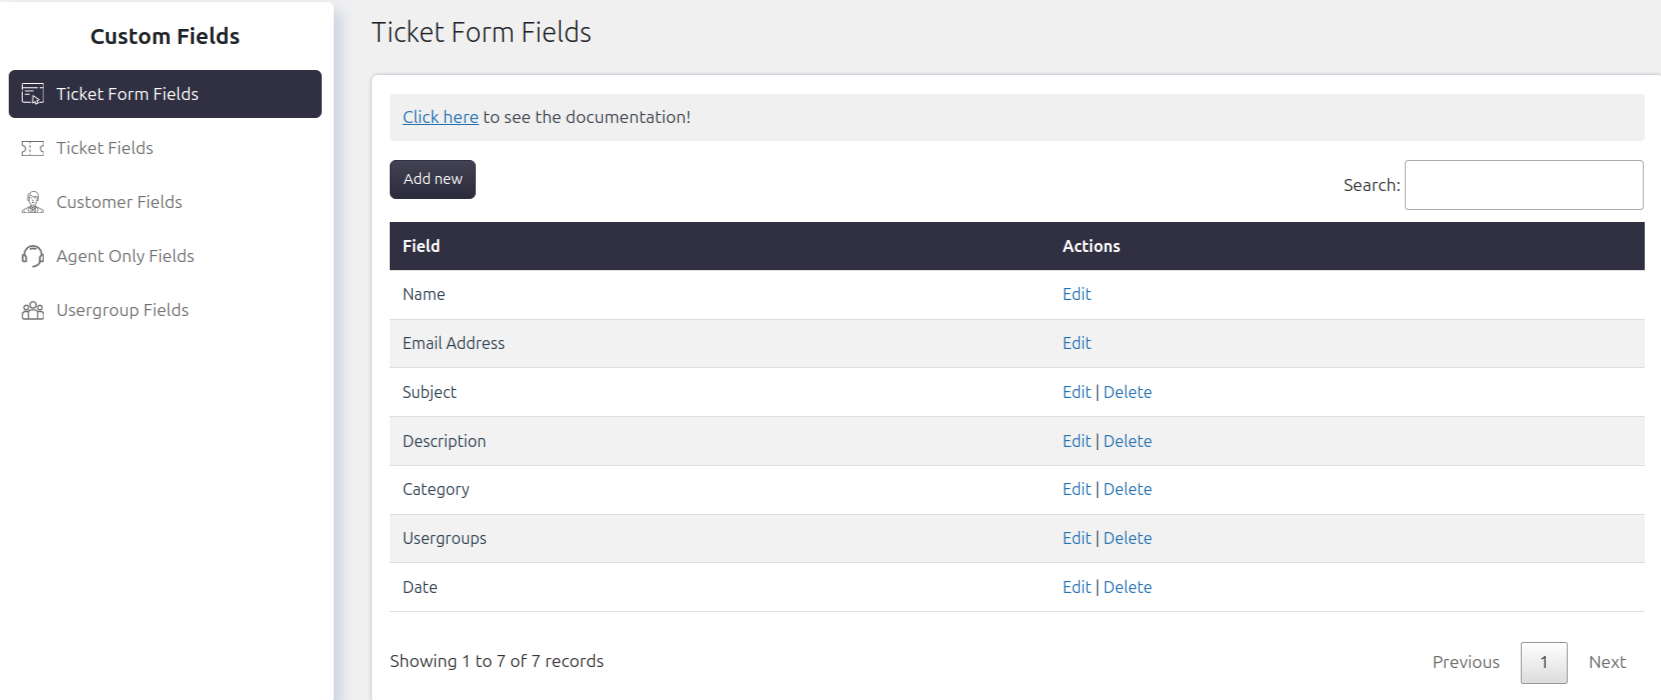
- Select a field from the available Ticket Fields or Customer Fields.
- Configure the field settings.
- Click Save.
The selected field will now appear on the ticket form.
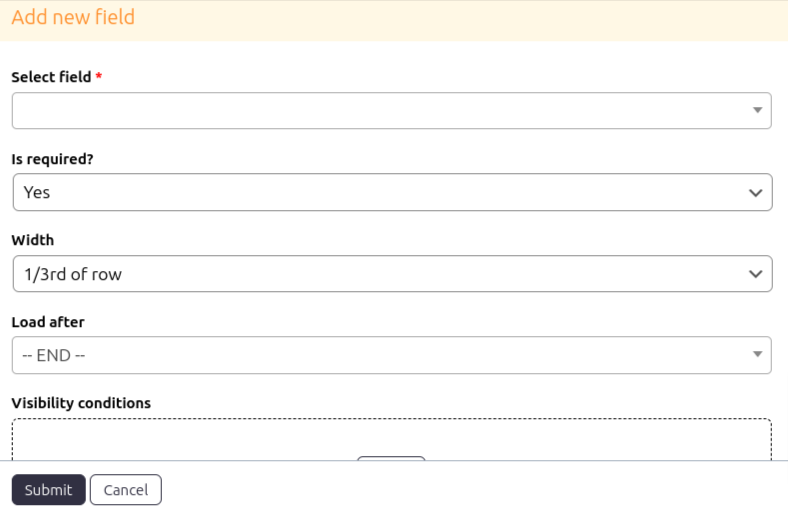
Options / Settings
- Select Field: Choose an existing field from Ticket Fields or Customer Fields to add to the ticket form.
- Is Required: Determines whether the field must be completed before the customer can submit the ticket.
- Yes – The field is mandatory.
- No – The field is optional.
- Width: Controls how much horizontal space the field occupies on the ticket form.
- 1/3 Width: Displays the field using one-third of the available row.
- Half Width: Displays the field using half of the available row. If there is not enough space, the field moves to the next row.
- Full Width: Displays the field across the entire row. If necessary, the field moves to a new row.
- Load After: Determines the position of the field within the ticket form by placing it after another field.
- Visibility Conditions: Controls when the field is displayed based on one or more conditions.
- The field remains hidden until the configured condition is met.
- You can combine multiple conditions using the following operators:
- AND – All conditions must be true.
- OR – At least one condition must be true.
Example
- Add the field to the Ticket Form.
- Mark it as Required.
- Set its width to Half Width.
- Configure a visibility condition so it appears only when the ticket category is Orders.
Notes / Tips
- The Name and Email fields cannot be removed from the ticket form.
- You cannot create new custom fields from this page.
- Create custom fields first in SupportCandy → Custom Fields → Ticket Fields, then add them to the Ticket Form.
- Use Visibility Conditions to keep the ticket form clean by displaying fields only when they are needed.