The General settings allow Agents to create scheduled Tickets from existing Tickets. This option can be enabled based on the requirements of your support workflow.
Where to Find
Go to Support → Settings → Schedule Tickets → General to configure the scheduled Ticket settings.
How It Works
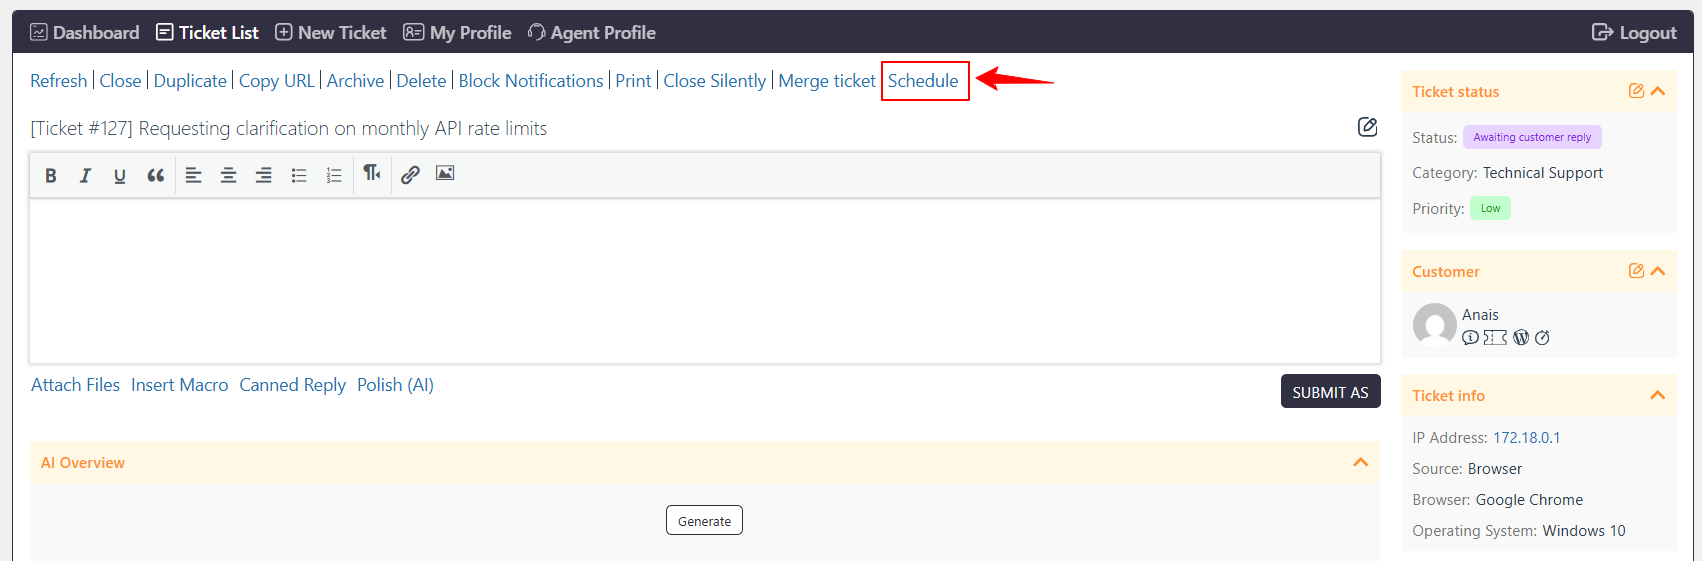
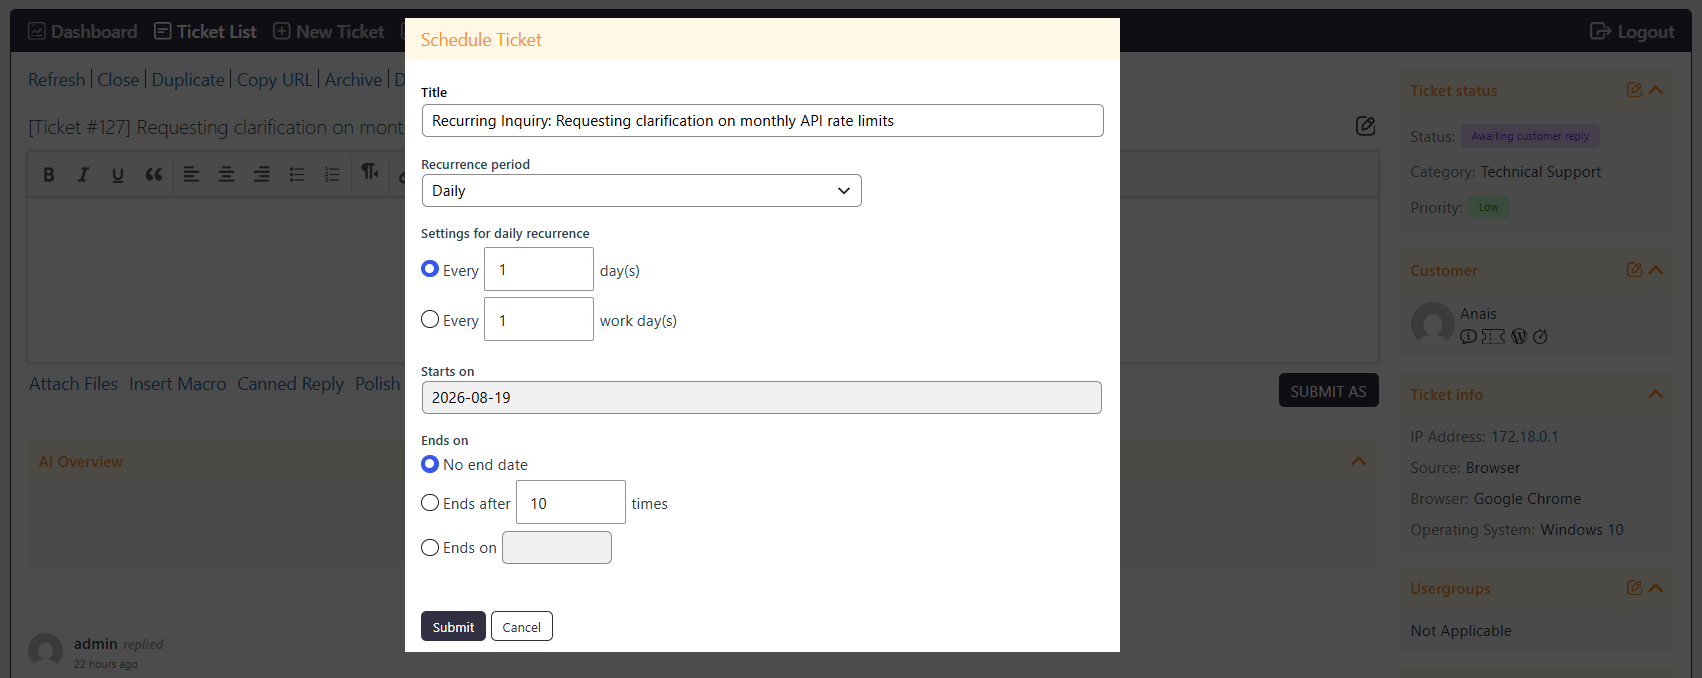
When Schedule from existing ticket is enabled, an Agent can create a scheduled Ticket from an existing Ticket. The scheduled Ticket uses the same custom fields as the existing Ticket. The Schedule option is displayed on the Ticket page above the reply box.
Modify scheduled ticket
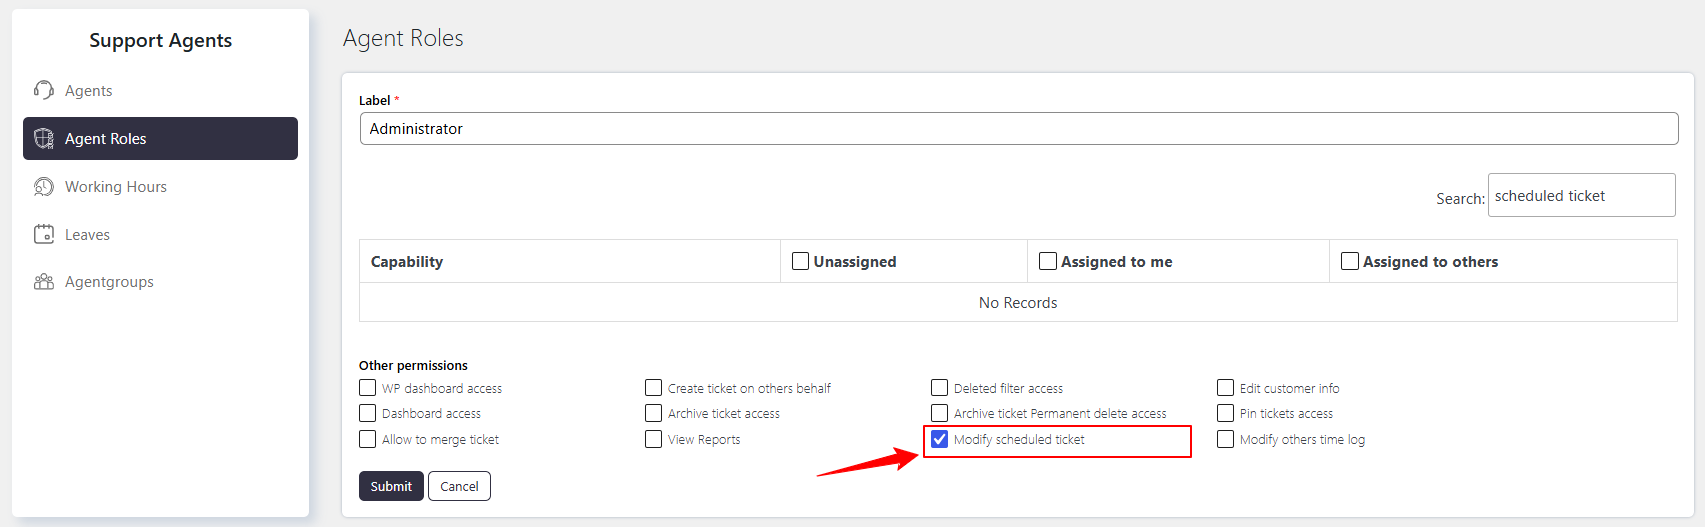
The Agent role must have the Modify scheduled ticket permission to create a scheduled Ticket from an existing Ticket. To enable this permission:
Go to Support → Support Agents → Agent Roles.
Click Edit for the required Agent role.
Go to Other Permission.
Enable Modify scheduled ticket.
Schedule from existing ticket
Enable Schedule from existing ticket to allow Agents to create a scheduled Ticket from an existing Ticket. When enabled:
The Schedule option is available above the reply box on the Ticket page.
The scheduled Ticket uses the same custom fields as the existing Ticket.
Step-by-Step Guide
To allow an Agent to create a scheduled Ticket from an existing Ticket:
Go to Support → Settings → Schedule Tickets → General.
Enable Schedule from existing ticket.
Go to the Ticket page.
Open an existing Ticket.
Use the Schedule option above the reply box to create a scheduled Ticket.
Example
For example, an Agent needs to schedule a follow-up Ticket from an existing Customer Ticket. Enable Schedule from existing ticket and give the Agent role the Modify scheduled ticket permission. The Agent can then use Schedule above the reply box to create the scheduled Ticket.