
Overview
Support agents are the users who manage and respond to customer tickets in SupportCandy. Before adding an agent, the person must already have a WordPress user account.
When adding an agent, you must also assign an Agent Role, which determines the permissions and capabilities available to that agent.
Where to Find
Go to: Support → Support Agents → Agents
How It Works
SupportCandy allows you to convert any existing WordPress user into a support agent. There are no restrictions on the user’s WordPress role.
Each agent must be assigned an Agent Role. You can use an existing role or create a new one with the required permissions.
Prerequisites
Before adding an agent, ensure that:
- The person has an existing WordPress user account.
- An appropriate Agent Role is available. You can use an existing role or create a new one.
Step-by-Step Guide
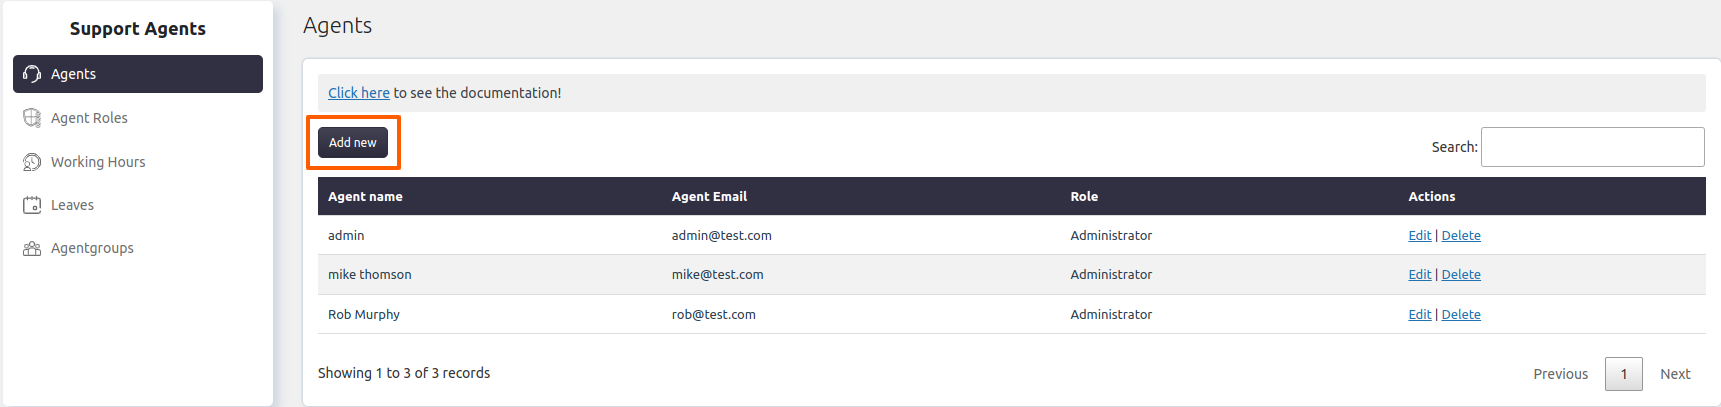
- Go to Support → Support Agents → Agents.
- Click Add New.
- Select one or more existing WordPress users.
- Choose an Agent Role.
- Click Submit.
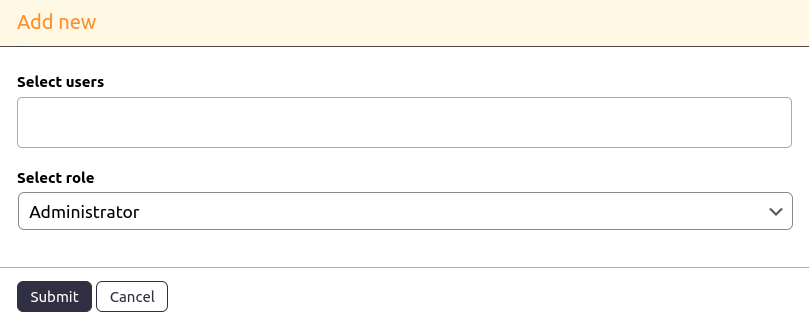
The selected users are now added as SupportCandy agents.
Example
Suppose you hire a new support representative named Sarah.
- Create a WordPress user account for Sarah.
- Go to Support → Support Agents → Agents.
- Add Sarah as a support agent.
- Assign the Support Agent role.
Sarah can now log in and manage tickets based on the permissions assigned to her Agent Role.
Example
- Any existing WordPress user can be added as a support agent.
- There is no restriction on the user’s WordPress role.
- You can add multiple users as agents at the same time.
- Assign the appropriate Agent Role to ensure agents have the correct permissions.