The Checklist feature allows admin users to create task lists that can be assigned to tickets. Support agents can mark tasks as complete as they work through the checklist, ensuring all necessary steps are followed. This feature helps maintain consistency and provides a clear overview of what has been accomplished and what remains to be done.
How to Enable
Navigate to Support > Settings > Productivity Suite > Checklist.
Enable the Checklist feature.
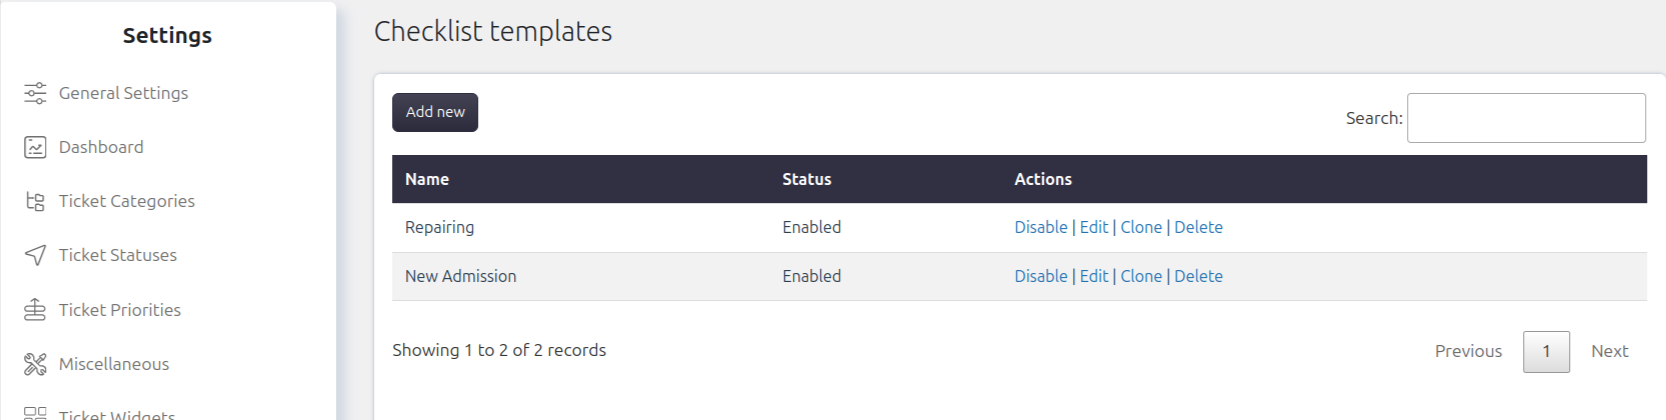
Managing Templates
Go to Support > Settings > Checklist Templates.
Here, admin users can create new checklists or edit/delete existing ones.
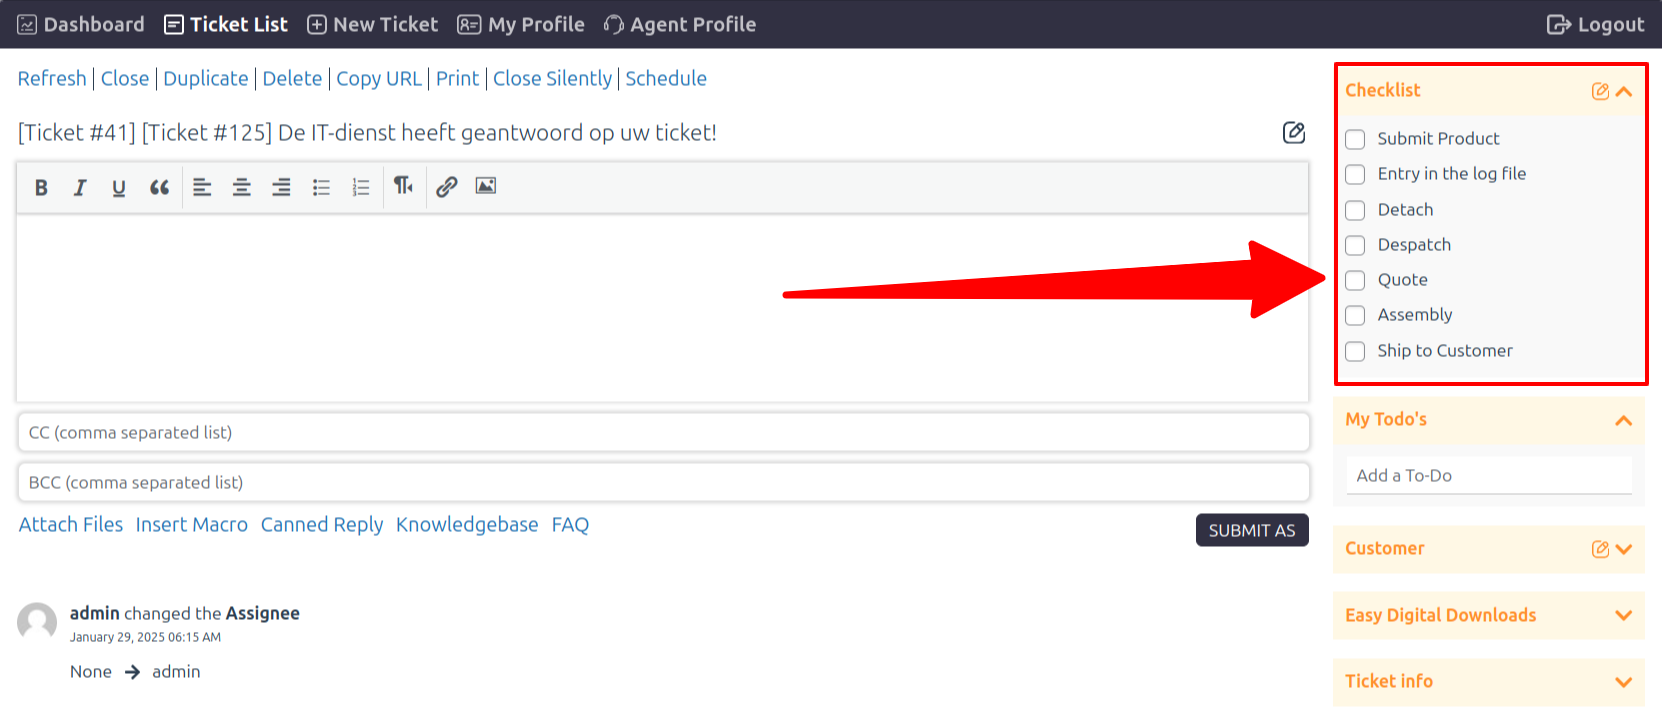
Assigning Checklists to Tickets
Enable the Checklist Widget by navigating to Support > Settings > Ticket Widgets > Checklist.
Once enabled, support agents can access the checklist on the ticket page under the Checklist Widget.
Agents can assign a checklist to a ticket and mark tasks as completed.
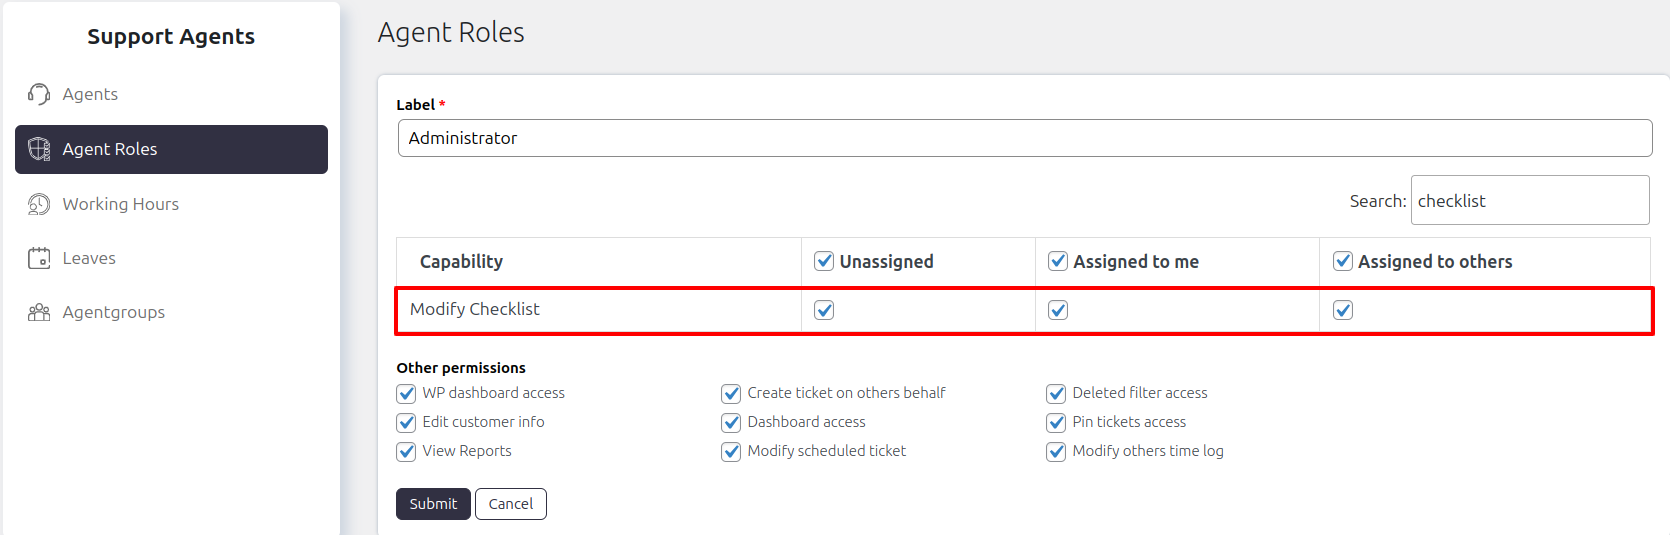
Permissions
Admin users can control which agent roles have permission to assign checklists or create new ones. This can be configured under Support > Support Agents > Agent Roles > Edit > Modify Checklist.