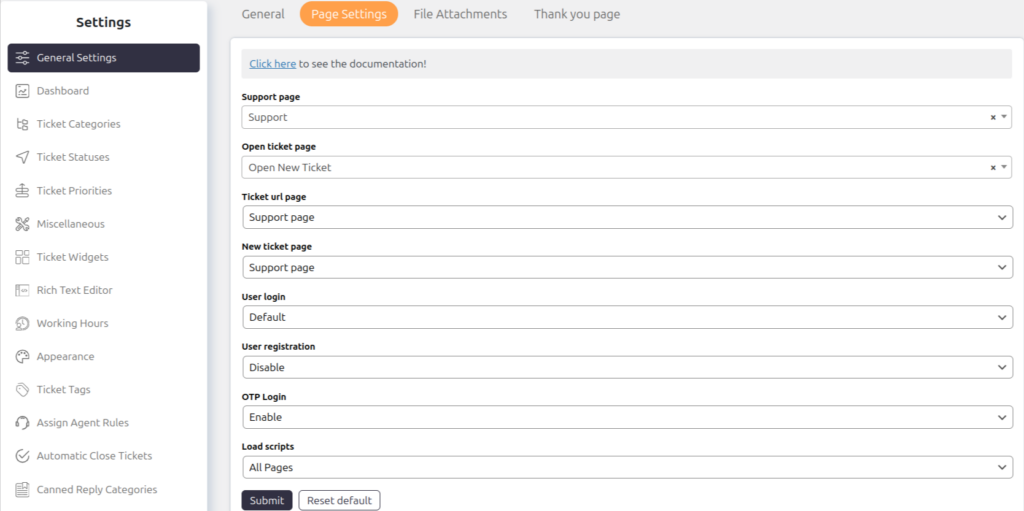
The Support Page is where the [supportcandy] shortcode is used to display the support portal on the front end. Leave this blank if you do not want to show the support portal. This page can also serve as the Ticket URL for notifications and links.
Open Ticket Page:
If you do not wish to use the full SupportCandy portal but want customers to view and manage their existing tickets, create a page with the [wpsc_open_ticket] shortcode and set it here. This page can also serve as the Ticket URL.
Ticket URL Page:
This page will be used as a Ticket URL page. You can set it to either the Support Page or Open Ticket Page depending on your requirements.
New Ticket Page:
This setting determines the New Ticket Link on the front end. It does not affect the backend link.
User Login:
This setting determines how users log in to access the support portal.
Options:
- Default: SupportCandy’s built-in login form.
- WP Default: WordPress default login functionality.
- Custom: Use a custom login page by entering the page URL.
User Registration:
This setting decides how users can register if they do not have an account.
Options:
- Disable: Disables user registration from SupportCandy. WordPress registration settings still apply.
- Default: SupportCandy’s built-in user registration form.
- WP Default: WordPress’s default user registration form. This will not work if WordPress registration is disabled.
- Custom: Use a custom registration page by entering the page URL.
OTP Login:
Allow guest users to authenticate via a one-time password (OTP) sent to their email. This enables guest users to manage their existing tickets without a user account.
Load Scripts:
Choose the pages where SupportCandy scripts should load. If you are using custom pages, ensure you select all pages containing SupportCandy shortcodes.

