Saved Filters
Saved filters allow users to create reusable ticket filters, saving time and effort when frequently applying the same criteria.
Overview
-
Who Can Use Filters?
Both customers and agents can filter tickets using custom criteria when default filters are insufficient.
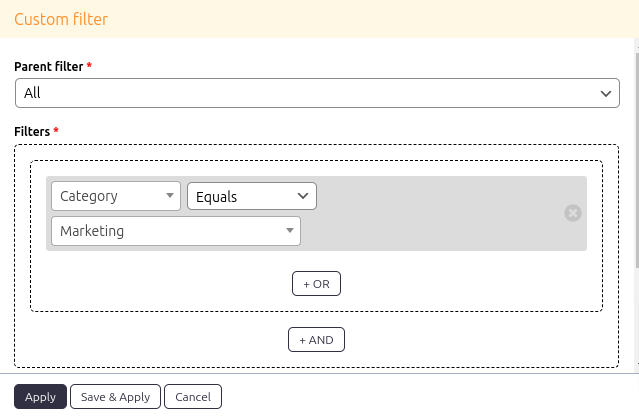
Example: A user wants to view tickets categorized under Marketing with a priority of High. -
Limitations of Custom Filters:
Custom filters are one-time only. If you need to apply the same filter repeatedly, you must recreate it each time.
Adding a Custom Filter
To add a custom filter:
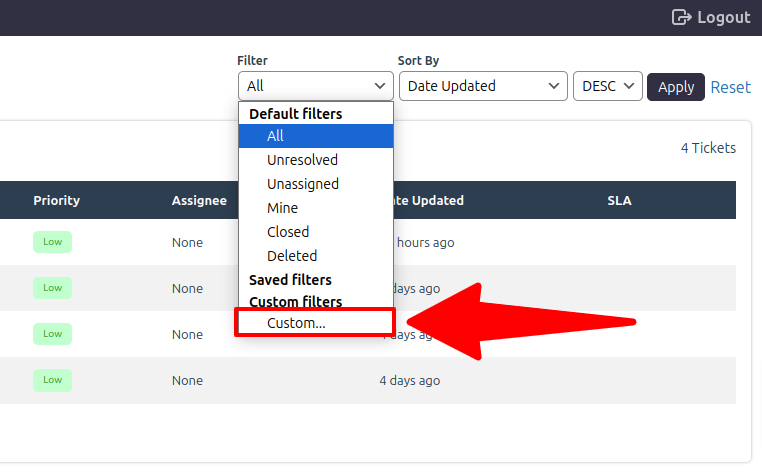
- Navigate to Support → Tickets → Filter → Custom.
- Select a Parent Filter (one of the default filters).
- Specify the desired criteria (e.g., category, priority).
- Choose additional options like Sort By and Sort Order.
- Click Apply to view the filtered tickets.
Saved Filters
Saved filters address the limitation of custom filters by enabling users to save their filter settings with a custom name/label. Once saved, you can apply the filter with a single click.
-
How Saved Filters Work:
- The Default Filters are set by the administrator and are available to all users.
- Saved Filters are user-specific, created and managed individually by users, and available only to them.
-
Managing Saved Filters:
Users can:- Add new saved filters.
- Edit existing saved filters.
- Delete saved filters they no longer need.
Saved filters make it convenient for users to streamline their workflow, especially when frequently working with specific ticket views.


