
Overview
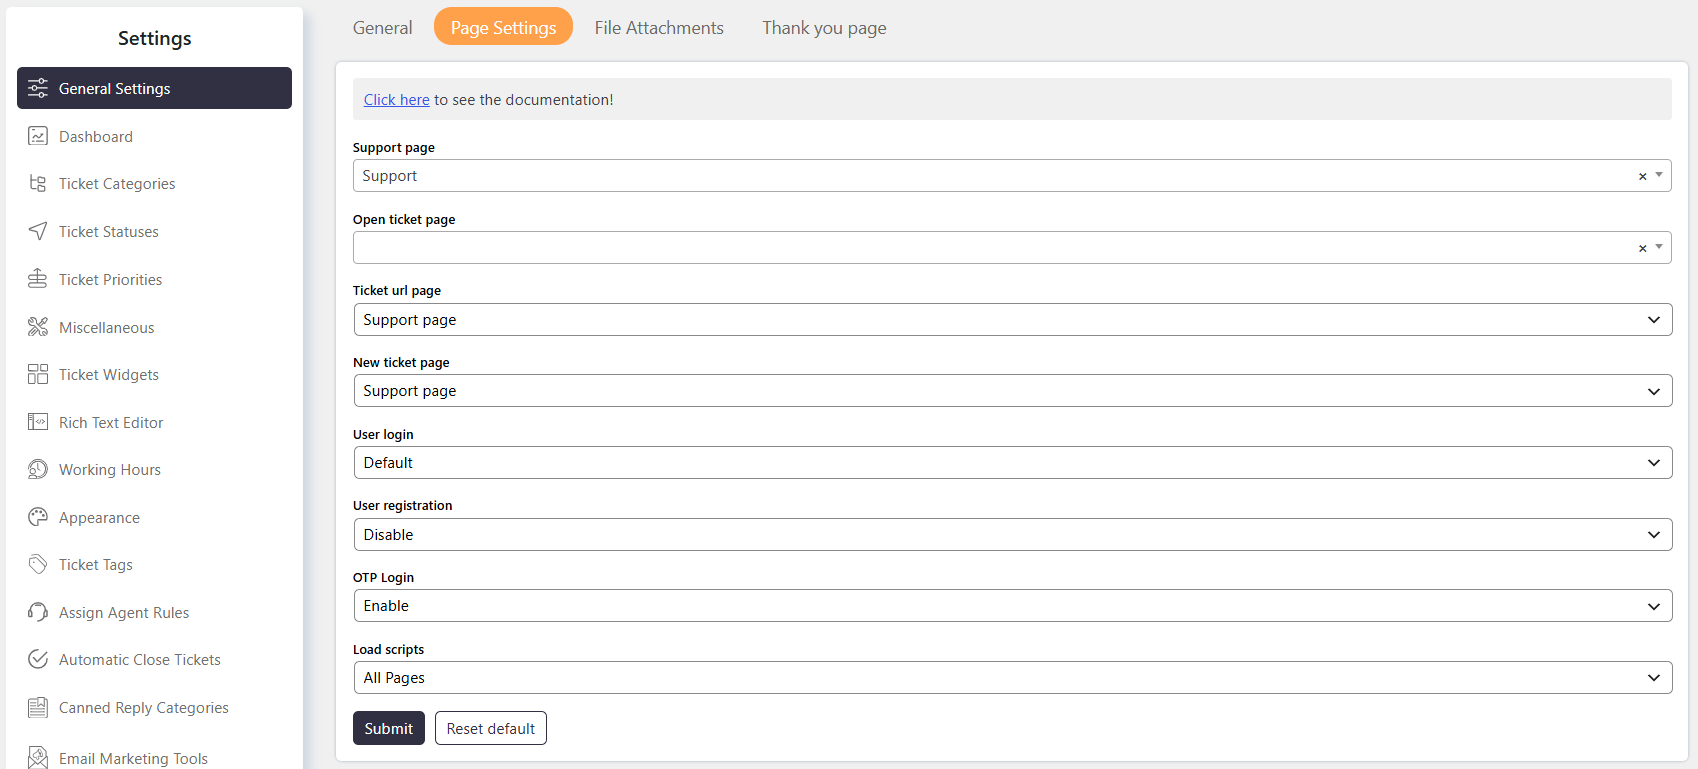
Page Settings allow you to configure the pages used by the SupportCandy support portal, ticket links, login, registration, and SupportCandy scripts.
These settings determine which pages customers use to access and manage their tickets.
Where to Find
Go to Support → Settings → General Settings → Page General.
How It Works
You can assign WordPress pages for different SupportCandy functions.
These settings can be used to display the full support portal, manage existing tickets, configure login and registration, and control where SupportCandy scripts load.
Step-by-Step Guide
- Open the SupportCandy Page Settings.
- Select the required Support Page.
- Select the Open Ticket Page if you want customers to manage existing tickets without the full portal.
- Select the Ticket URL Page.
- Configure the New Ticket Page.
- Select the required User Login option.
- Configure User Registration if required.
- Enable or disable OTP Login as required.
- Select the pages where SupportCandy scripts should load.
- Save the settings.
Options / Settings
Support Page
The support page is the page where the [supportcandy] shortcode displays the SupportCandy support portal on the front end.
Leave this setting blank if you do not want to display the support portal.
This page can also be used as the Ticket URL for notifications and links.
Open Ticket Page
The open ticket page allows customers to view and manage their existing tickets without using the full SupportCandy portal.
Create a page containing the [wpsc_open_ticket] shortcode and select that page here.
This page can also be used as the Ticket URL.
Ticket URL Page The ticket URL page defines the page used for the Ticket URL. You can select either the Support Page or Open Ticket Page, depending on your requirements.
New Ticket Page Defines the page that opens when a Customer clicks the New Ticket link on the frontend. You can choose from the following options:- Support Page – Uses the same SupportCandy page to create a new ticket. The SupportCandy Create Ticket Form is loaded on this page.
- Custom Page – Use this option if you are using another plugin to create the ticket form. Enter the URL of the page containing the form. Customers are redirected to this page when they click New Ticket.
User Login Defines how users log in to access the support portal. Available options are:
- Default – Uses SupportCandy’s built-in login form.
- WP Default – Uses the WordPress default login functionality.
- Custom – Uses a custom login page. Enter the page URL for the custom login page.
- Disable – Disables user registration from SupportCandy. WordPress registration settings still apply.
- Default – Uses SupportCandy’s built-in user registration form.
- WP Default – Uses the WordPress default user registration form. This option does not work when WordPress registration is disabled.
- Custom – Uses a custom registration page. Enter the page URL for the custom registration page.
Load Scripts Defines the pages where SupportCandy scripts should load. If you use custom pages, make sure you select all pages that contain SupportCandy shortcodes.
Example
If you want customers to use a custom support portal page:
- Create a WordPress page containing the
[supportcandy]shortcode. - Select that page as the Support Page.
- Select the required Ticket URL Page.
- Make sure the page is included in Load Scripts.
Customers can then access the SupportCandy portal from the selected page.
Notes / Tips
- Leave Support Page blank if you do not want to display the SupportCandy portal.
- Use
[supportcandy]on the Support Page to display the support portal. - Use
[wpsc_open_ticket]on the Open Ticket Page to allow customers to manage existing tickets - Select the correct Ticket URL Page so ticket links and notifications point to the required page.
- If using custom SupportCandy pages, include them in Load Scripts.
- OTP Login allows guest users to access existing tickets without a user account.