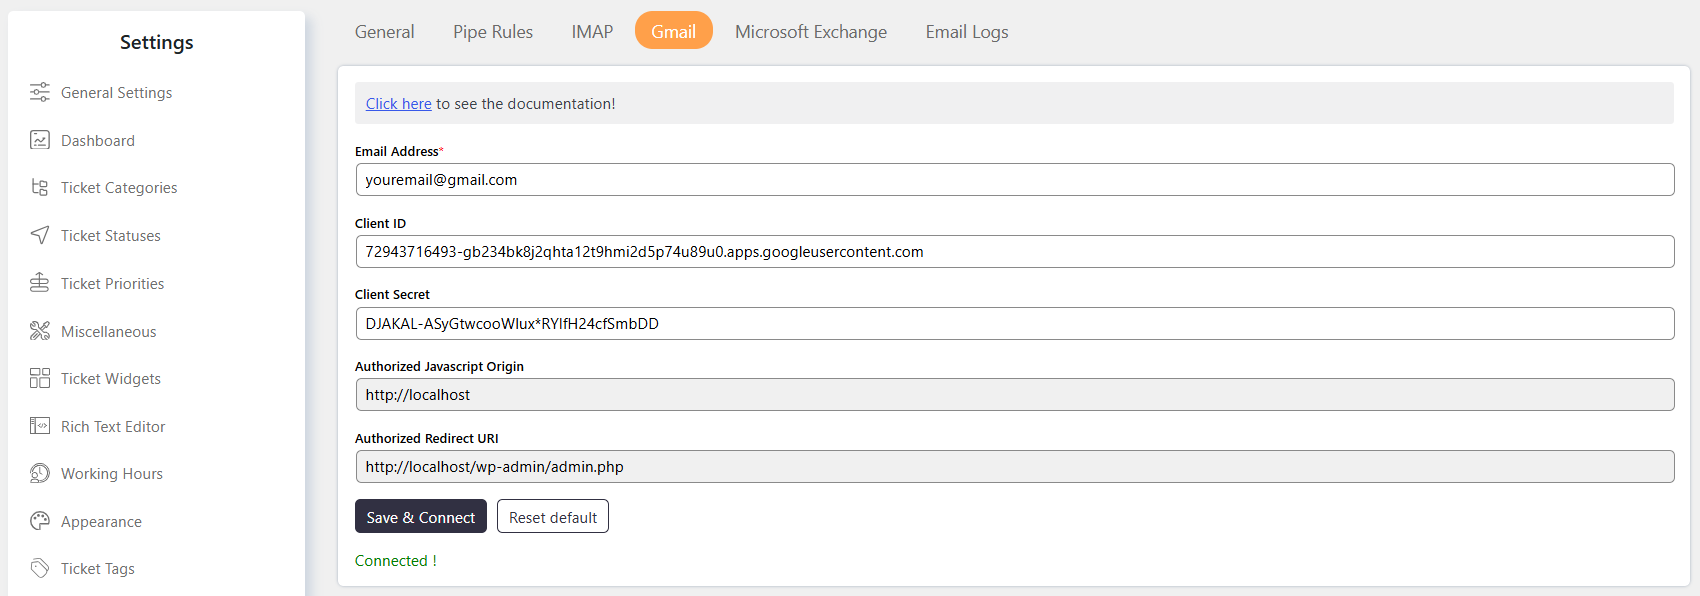
The Gmail Settings allow you to connect a Gmail account to SupportCandy using Gmail APIs. After the Gmail connection is configured, SupportCandy can use the Gmail account for Email Piping. Gmail requires a Google Cloud Project, Gmail API access, and OAuth credentials before it can be connected to SupportCandy.
Where to Find
To select Gmail as the Email Piping connection, go to: Support → Settings → Email Piping → General Then select GMail as the connection.
How It Works
SupportCandy uses Gmail APIs to connect to the selected Gmail account. The setup requires you to:
Select GMail as the Email Piping connection.
Create a Google Cloud Project.
Enable the Gmail API.
Configure the OAuth consent screen.
Create OAuth credentials.
Connect the Gmail account to SupportCandy.
Configure a real-time CRON job for reliable email checking.
Step-by-Step Guide
1. Set connection in general settings
Go to Support → Settings → Email Piping → General.
Select GMail as the Connection.
Save the settings if required.
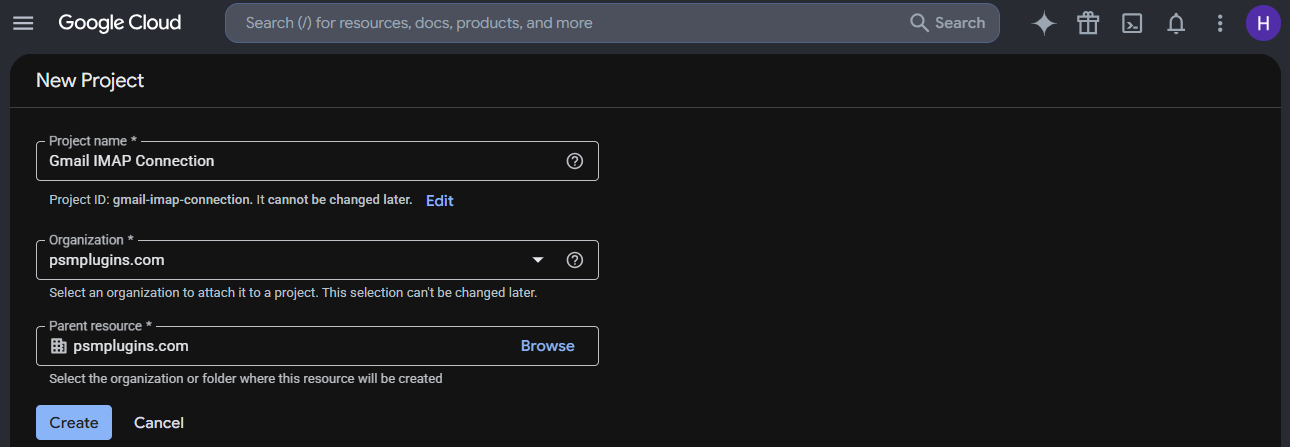
2. Create a Google Cloud Project
A Google Cloud Project is required to use Google Workspace APIs.
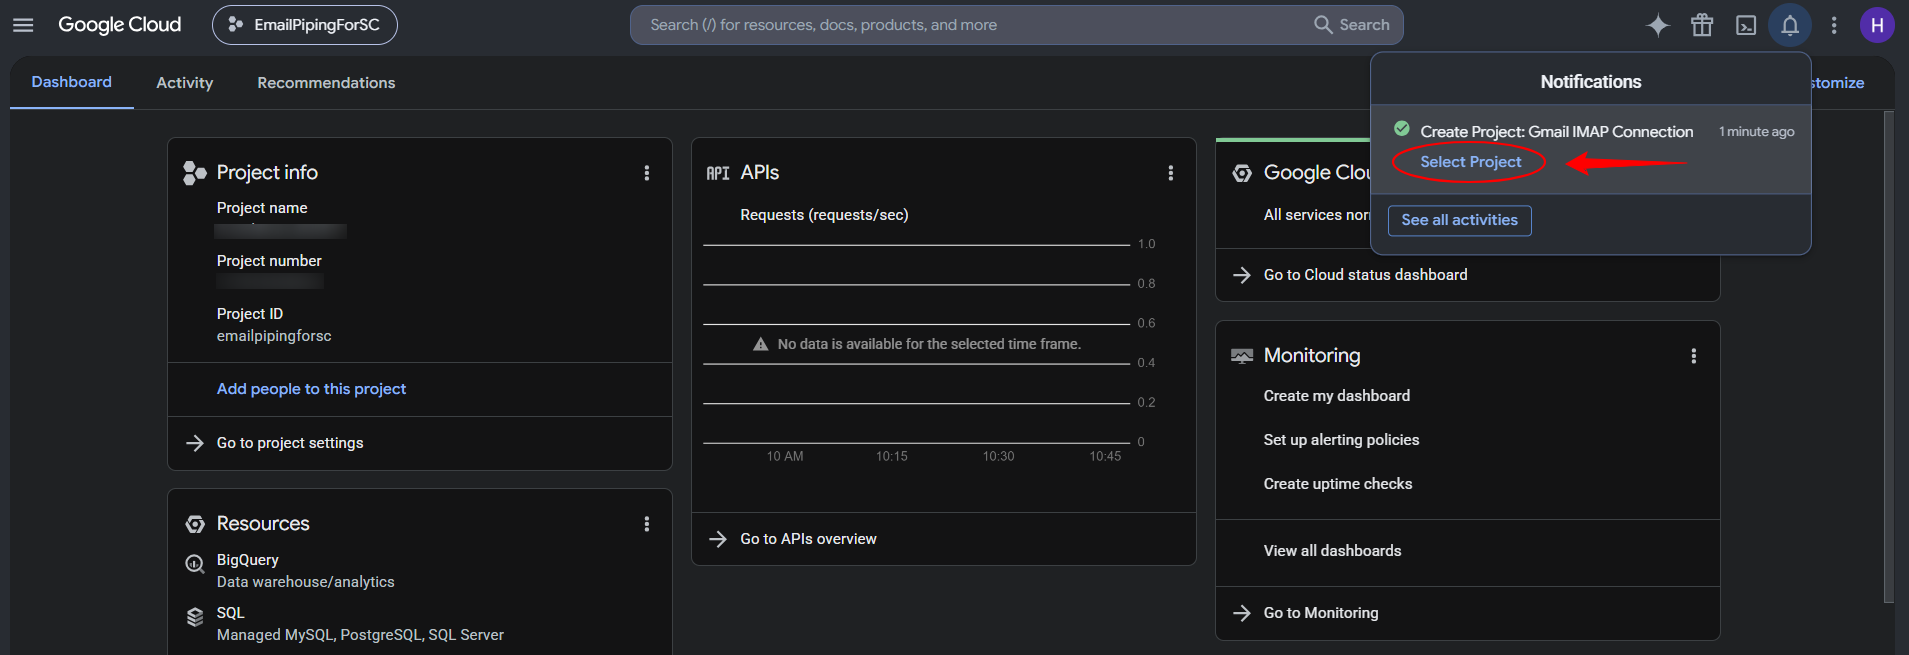
After creating the project, it may take a few minutes before it becomes available.
Open the Google Cloud Console.
Select the project you created.
Continue with the Gmail API configuration.
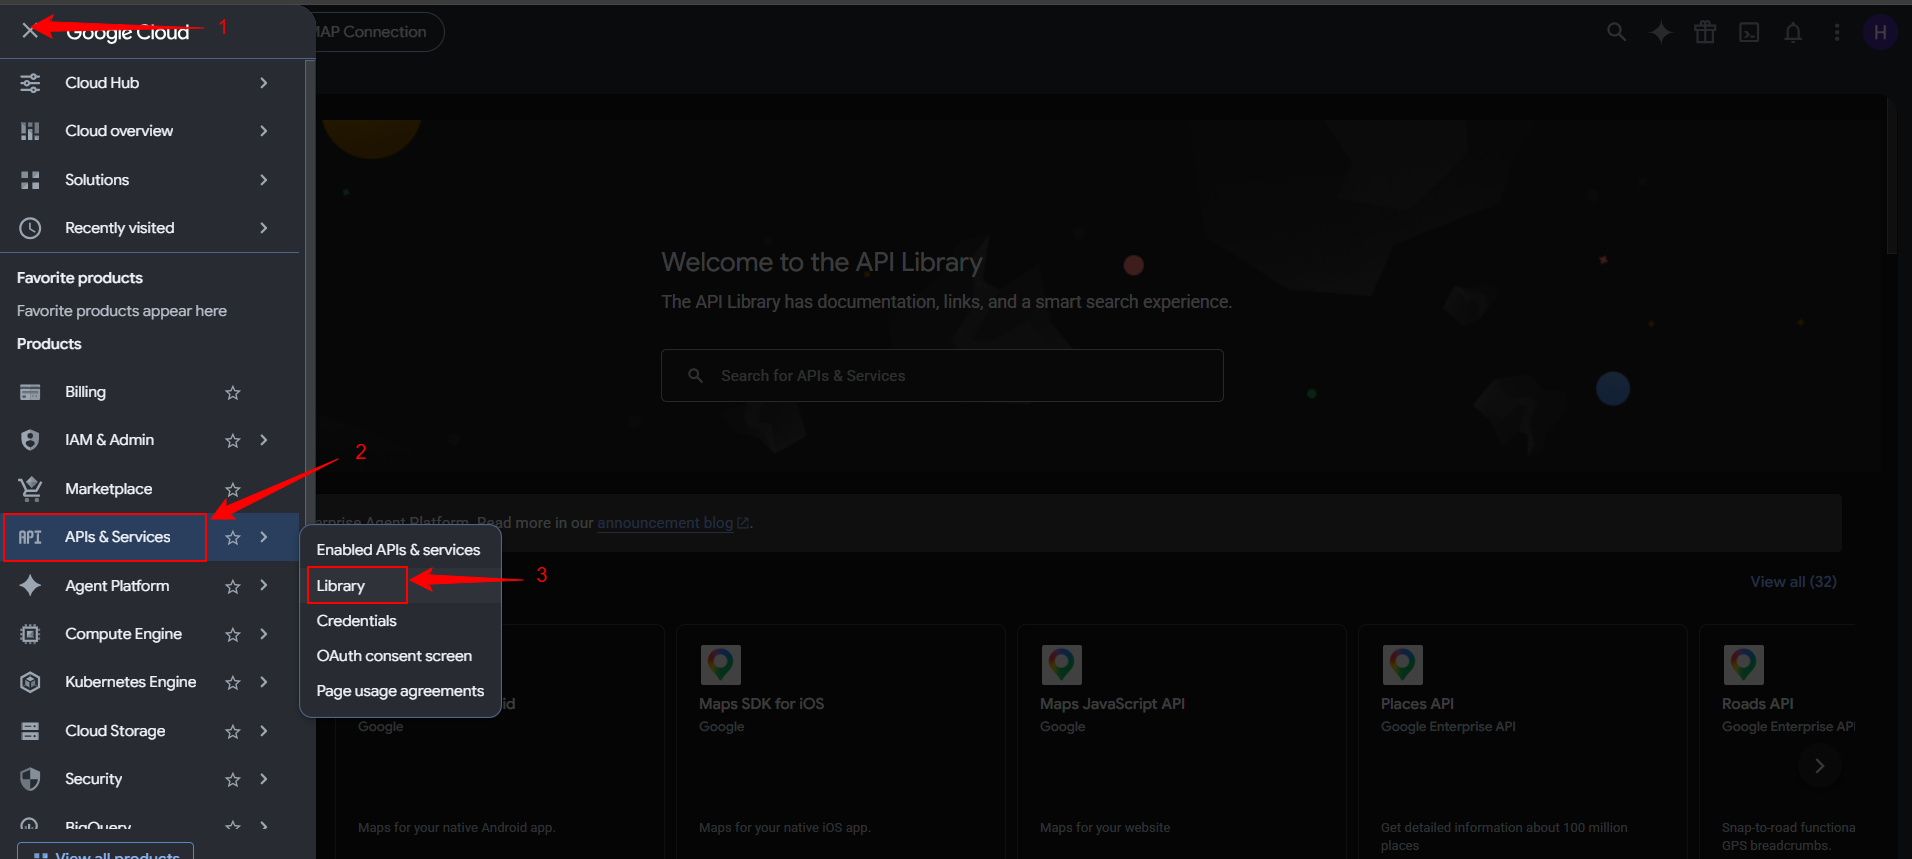
4. Enable Gmail API
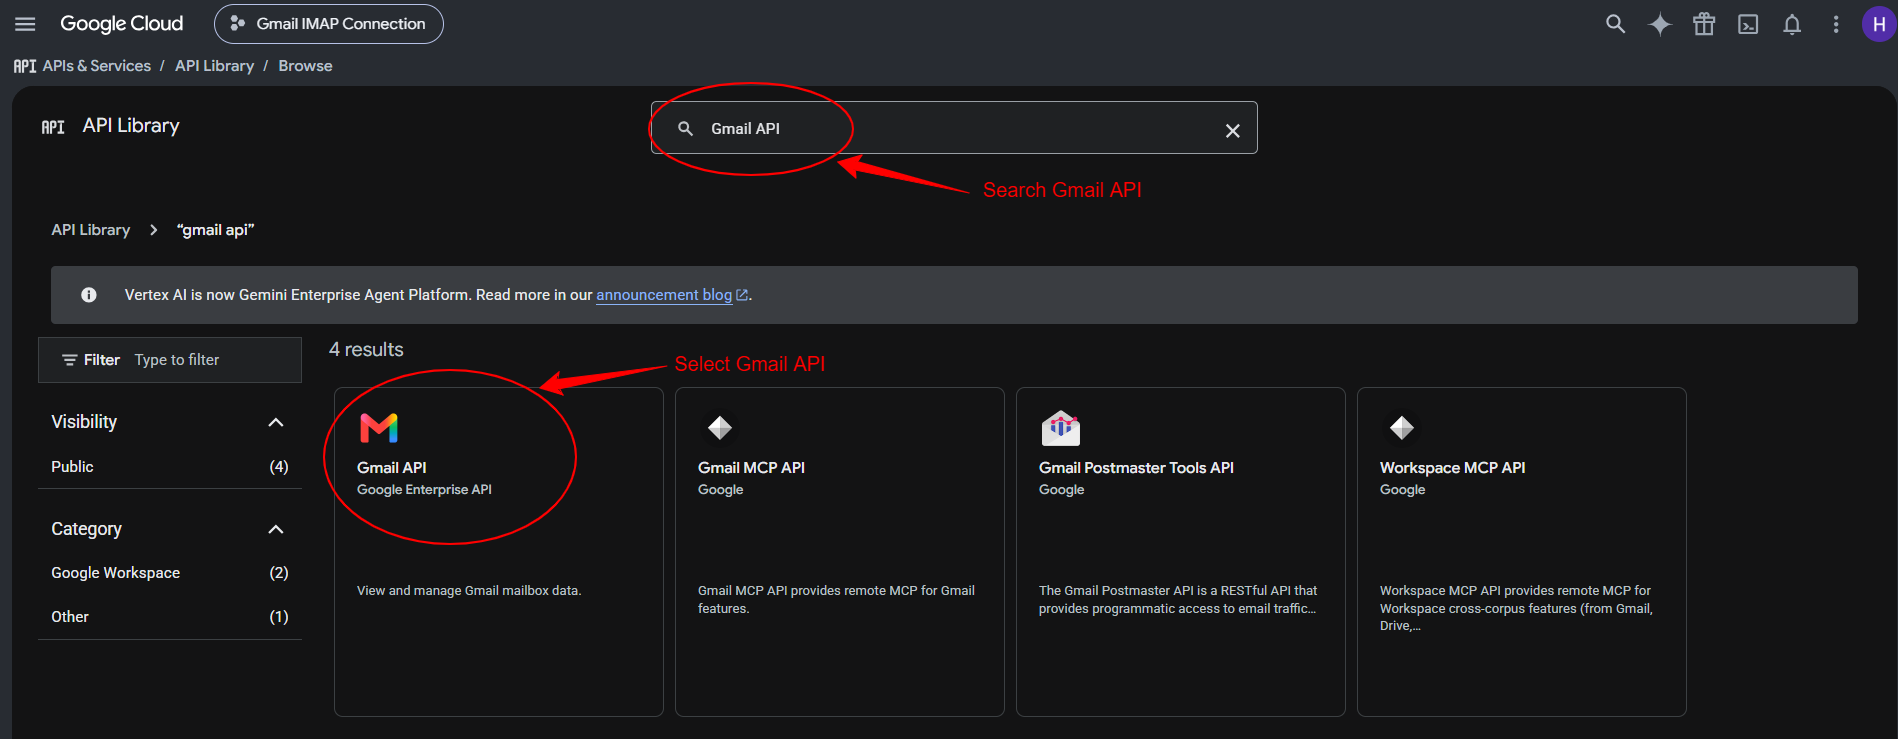
Open Menu → APIs and services → Library.
Search for Gmail API.
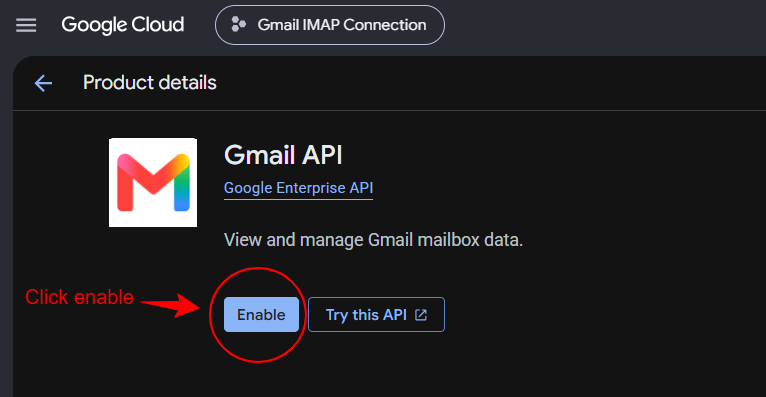
Select Gmail API from the search results.
Click Enable.
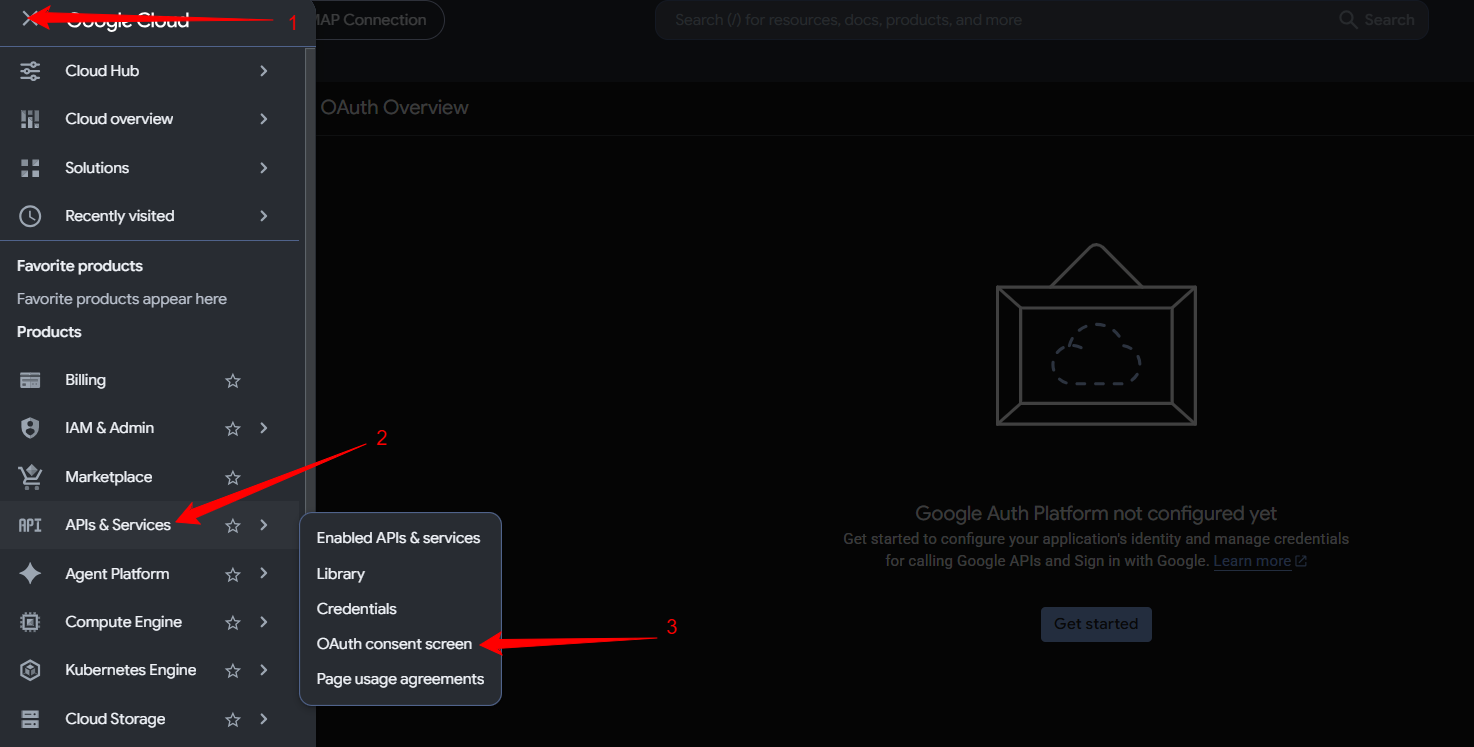
5. Set up OAuth consent screen
Configure the OAuth consent screen for the Gmail API application.
Open the OAuth consent screen section.
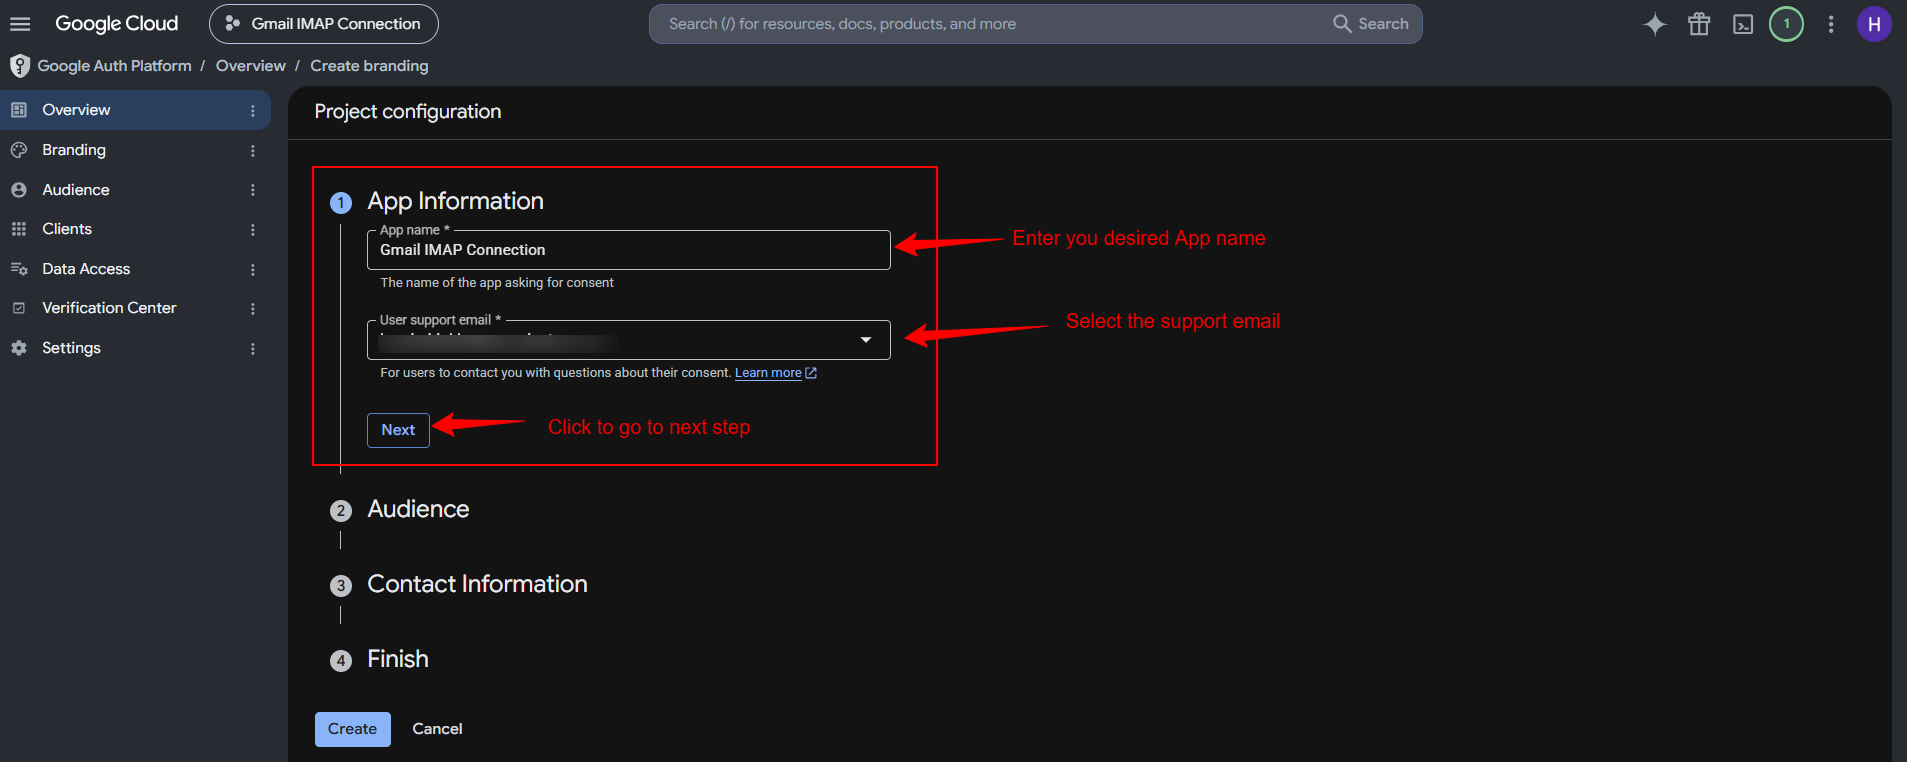
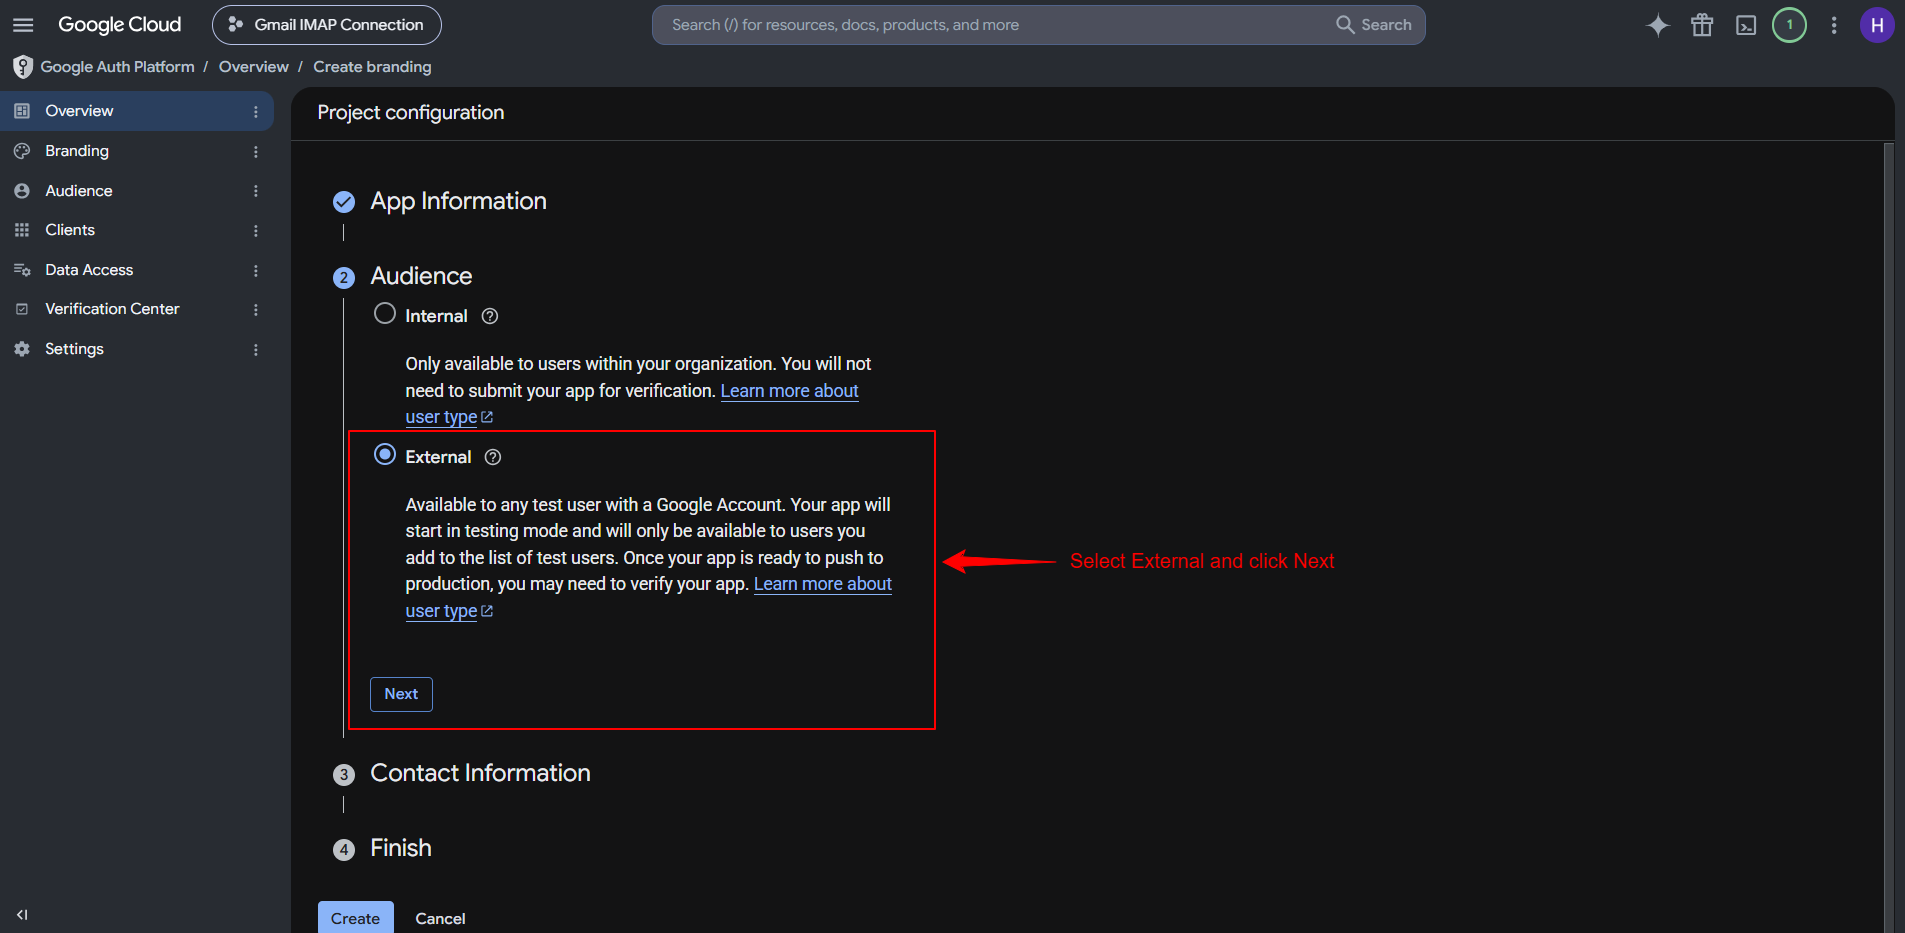
Enter the Application Information and click Next button.
Select External as Audience.
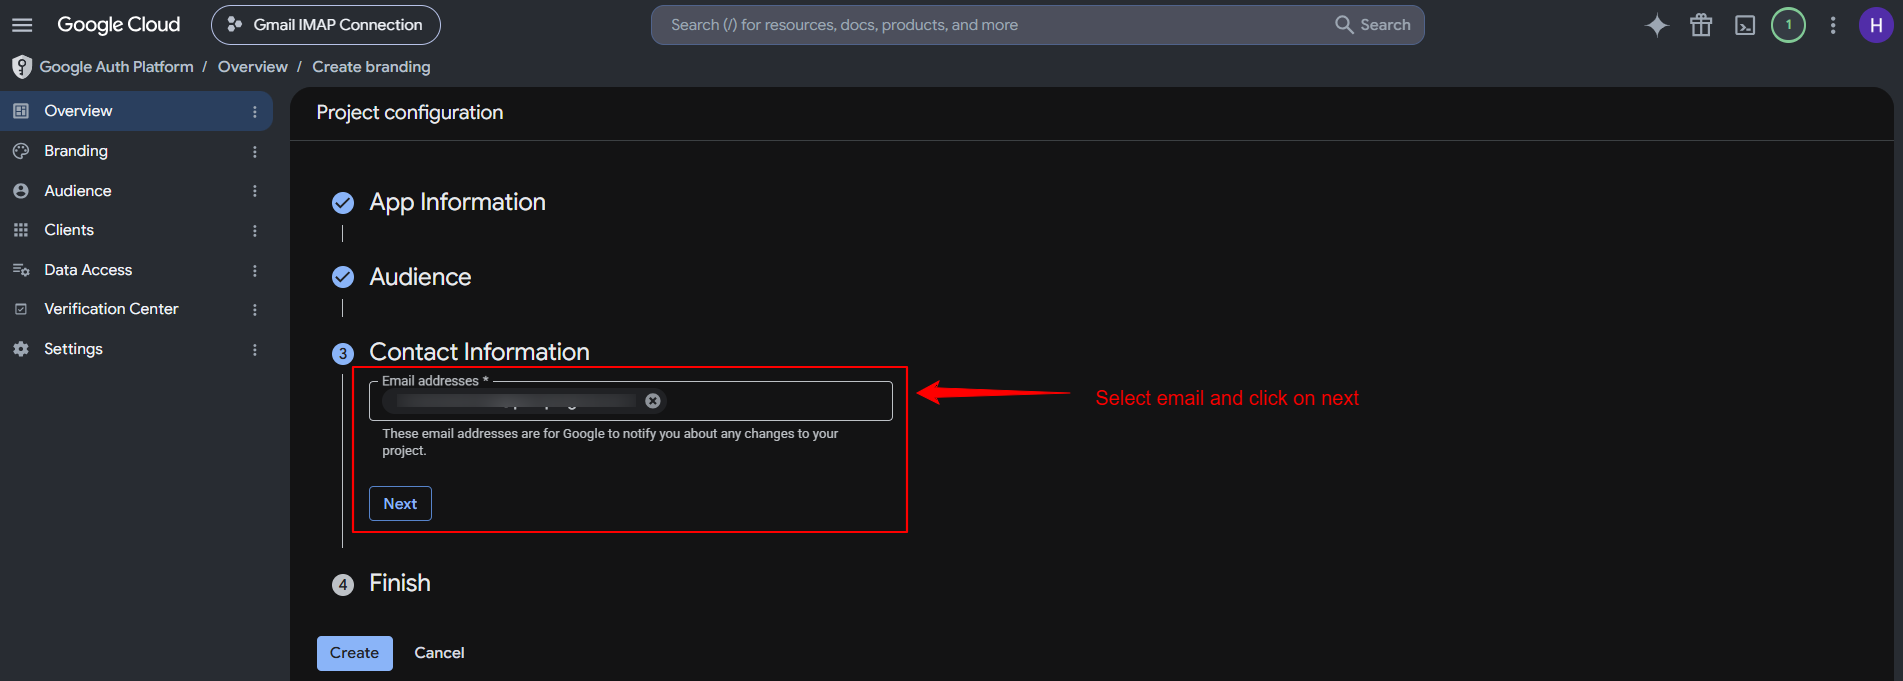
Select email address of developer as Contact Information.
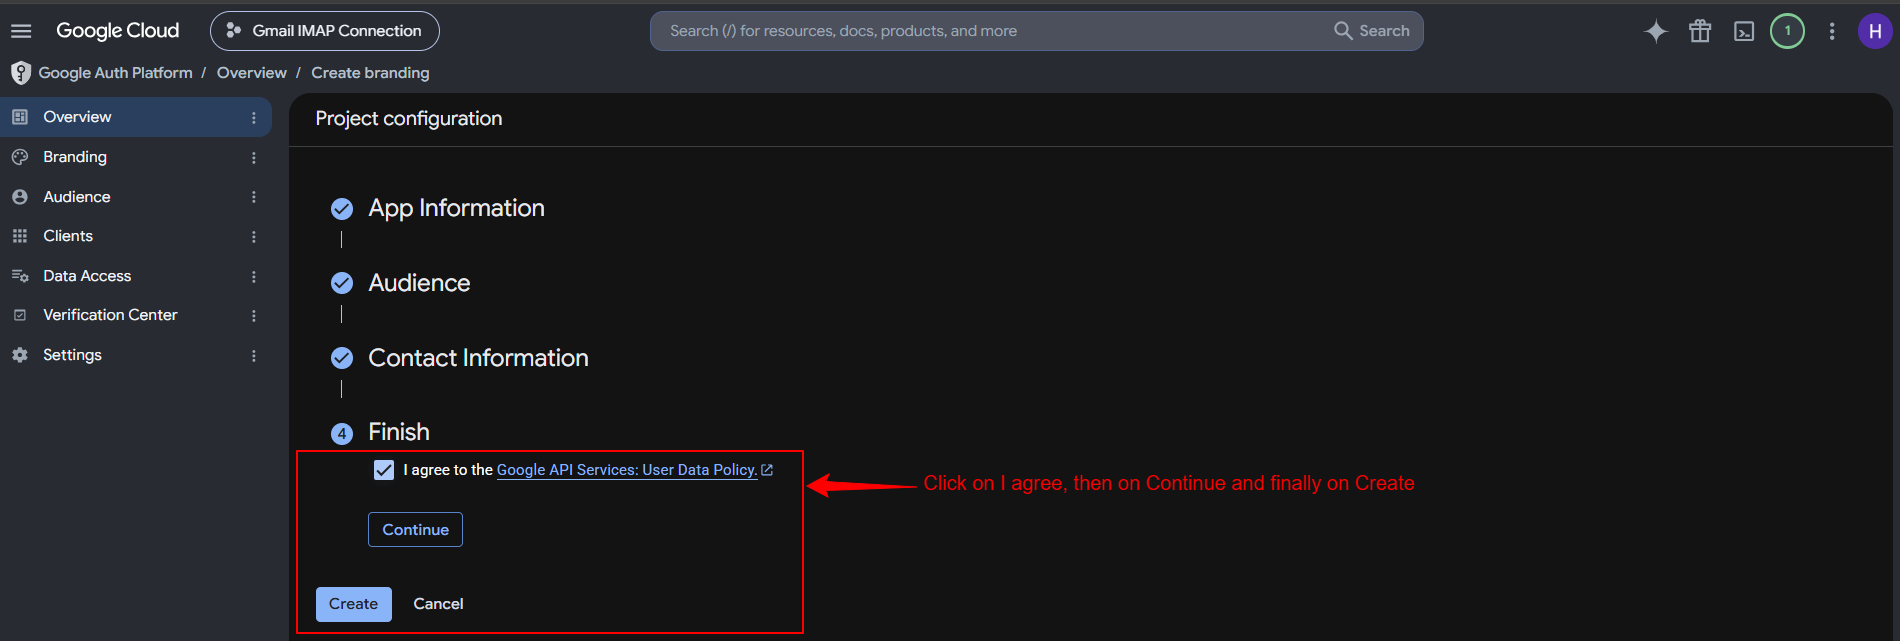
Click on I agree and continue to finish the setup.
Click Create.
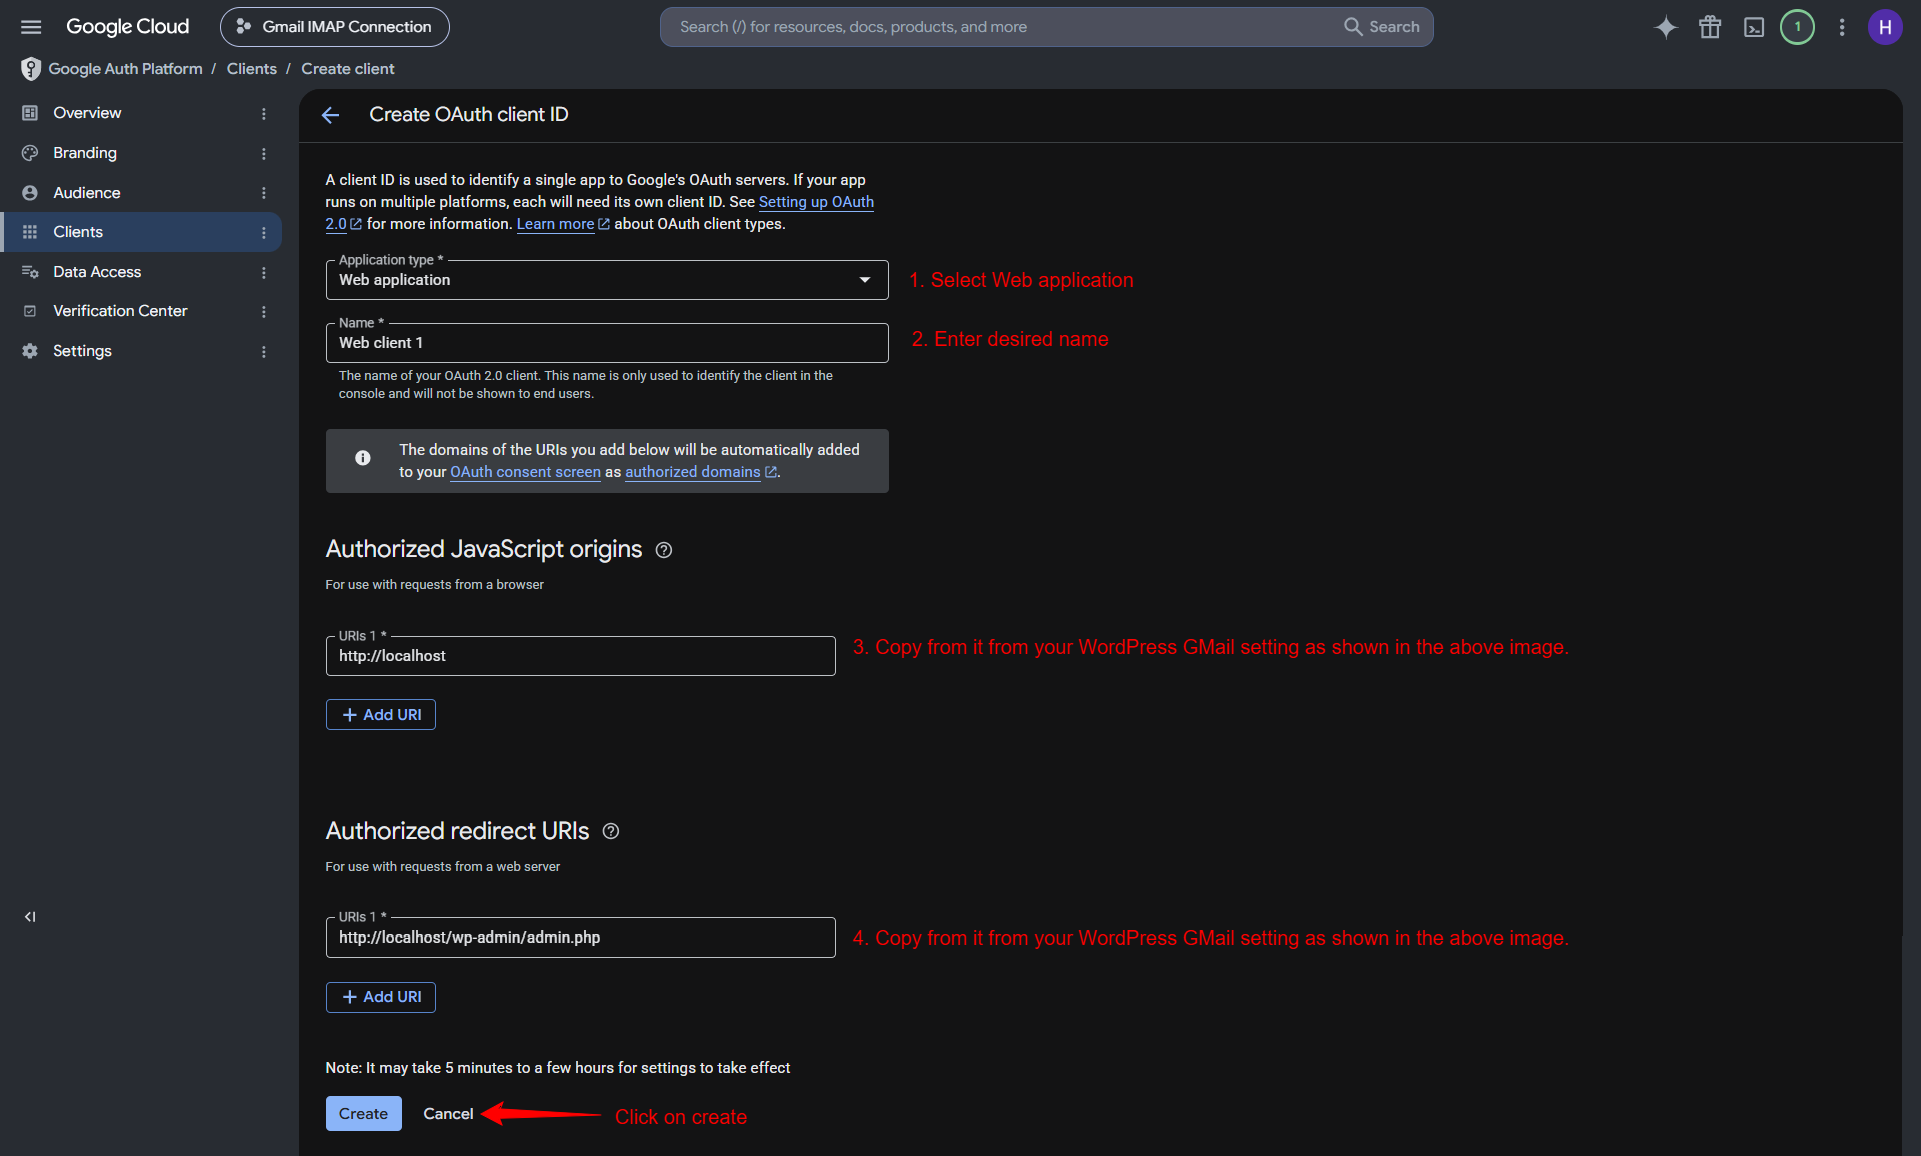
6. Create new credentials
Create the OAuth credentials required to connect Gmail with SupportCandy.
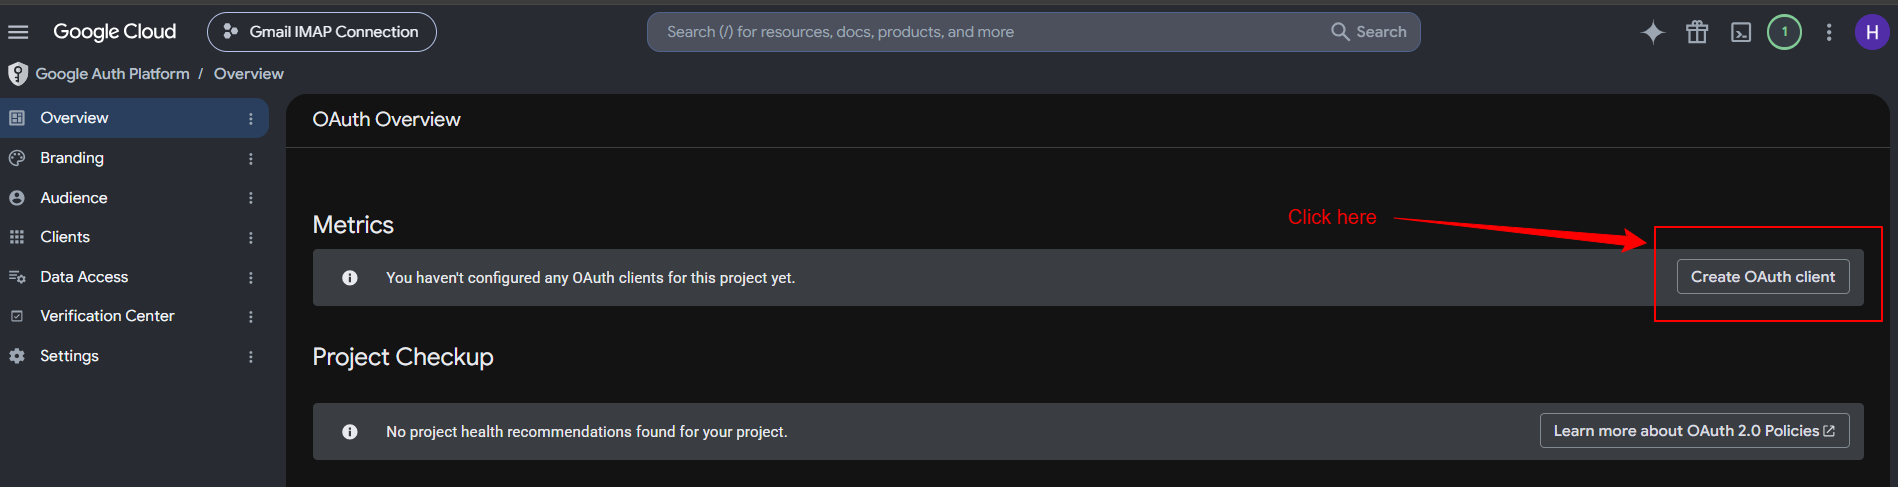
Go to the Create OAuth Client section.
Start fill the all infor.
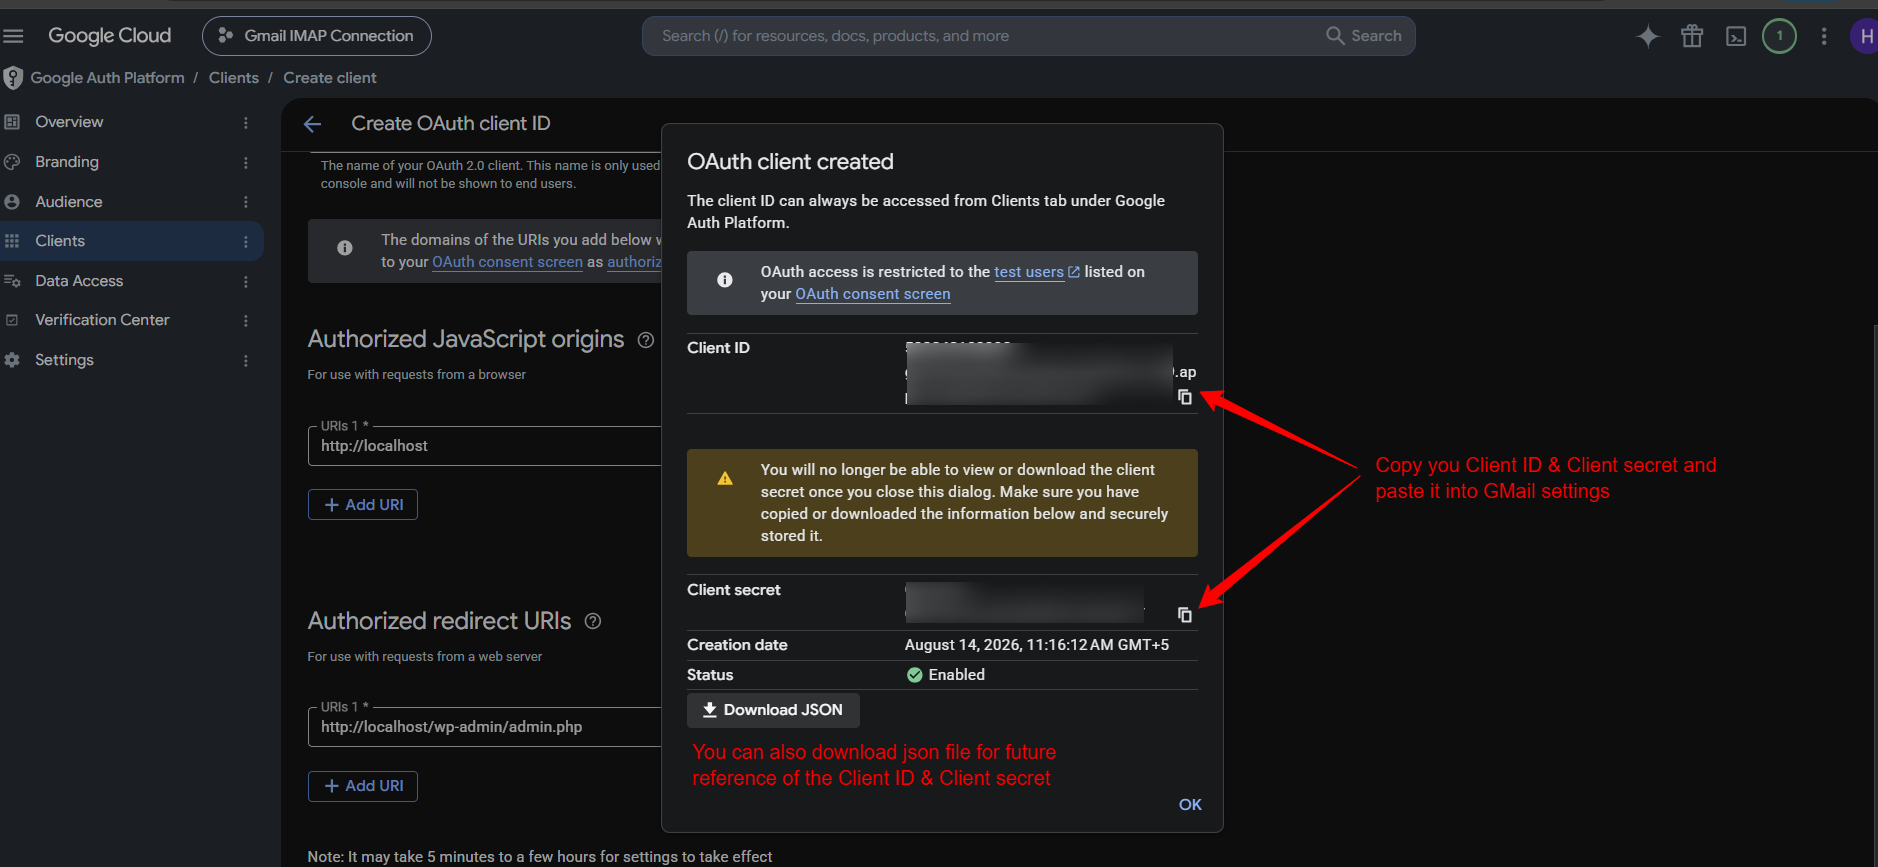
Click on create.
You will see the popup appeared on screen.
Copy Client ID & Client secret and download the json for future reference of Client ID and Client secret.
7. Connect to the Gmail APIs
Use the generated Google credentials to connect the Gmail account to SupportCandy. Follow the Gmail connection process provided in the SupportCandy Email Piping settings.
Example
To connect a Gmail account for Email Piping:
Select GMail under Support → Settings → Email Piping → General.
Create a Google Cloud Project named SupportCandy.
Enable the Gmail API.
Configure the OAuth consent screen.
Create the required OAuth credentials.
Publish the app.
Connect the Gmail account through SupportCandy.
Configure a real-time CRON job.
After the connection is configured, Gmail can be used as the Email Piping connection.
Notes / Tips
Gmail Email Piping uses the Gmail API.
A Google Cloud Project is required for the Gmail API setup.
Make sure the Gmail API is enabled for the selected project.
Complete the OAuth consent screen before creating the required credentials.
Select GMail under Support → Settings → Email Piping → General.
WordPress CRON may not provide consistent email checking when the website has low visitor activity.
A real-time CRON job is recommended for reliable Email Piping.
Troubleshooting Tips
1. Email Piping Disconnects After a Few Days
If email piping works initially but disconnects after a few days, this may be related to low traffic on your website.
If your website does not receive visits for several days, WordPress Cron may not run regularly. As a result, the refresh token or access token may expire, and email piping may stop working.
In this case, we recommend setting up an external Cron job. An external Cron service can access your website at regular intervals and trigger WordPress Cron even when your site has little or no traffic.
2. Email Piping Suddenly Stops Working
If Gmail email piping suddenly stops working, try resetting the Gmail connection:
Open the Google Account App Permissions page and make sure you are logged in with the Gmail account used for email piping.
Find and remove the Google app you created for Gmail email piping.
Go to SupportCandy → Settings → Email Piping.
Click Save & Connect. The email address you want to pipe should already be entered.
Select the Gmail account you want to use for email piping.
If you see a “This app isn’t verified” warning, click Advanced.
Click Go to [Your App] (unsafe). This warning appears because you are using your own Google app.
Click Allow to complete the connection.
Send a few test emails to the piped Gmail address.
Wait 2–3 minutes if your email piping Cron is configured to run every minute, and check whether the tickets are created.