
Overview
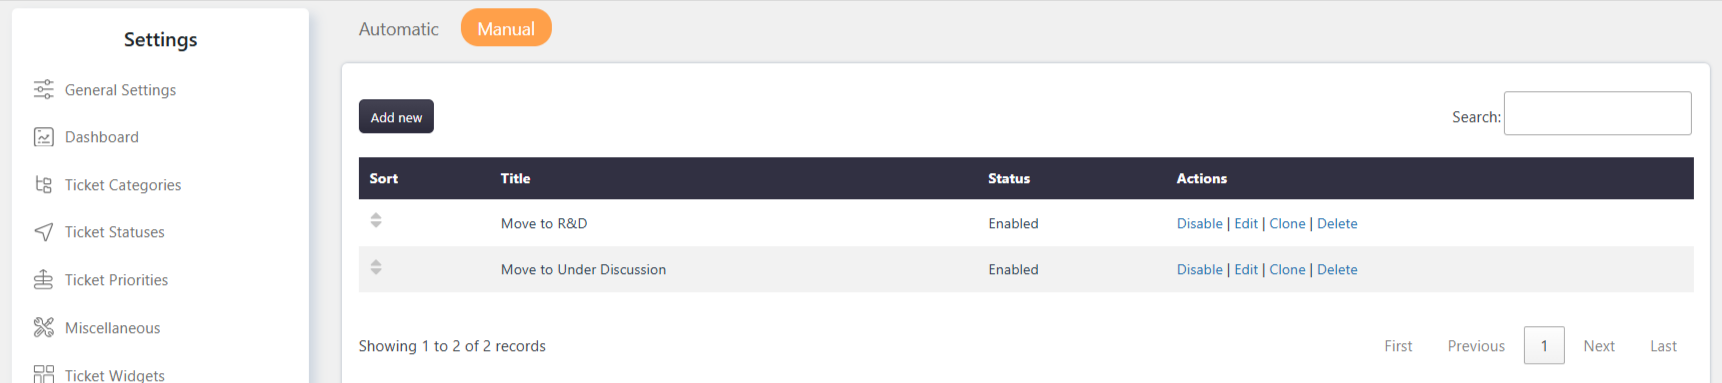
The Manual Workflow feature allows Agents to run predefined workflows from an individual ticket page.
A Manual Workflow uses conditions to check ticket information and actions to perform specific tasks. This helps Agents handle repetitive ticket updates consistently.
Where to Find
Go to Support → Workflows → Add Workflow.
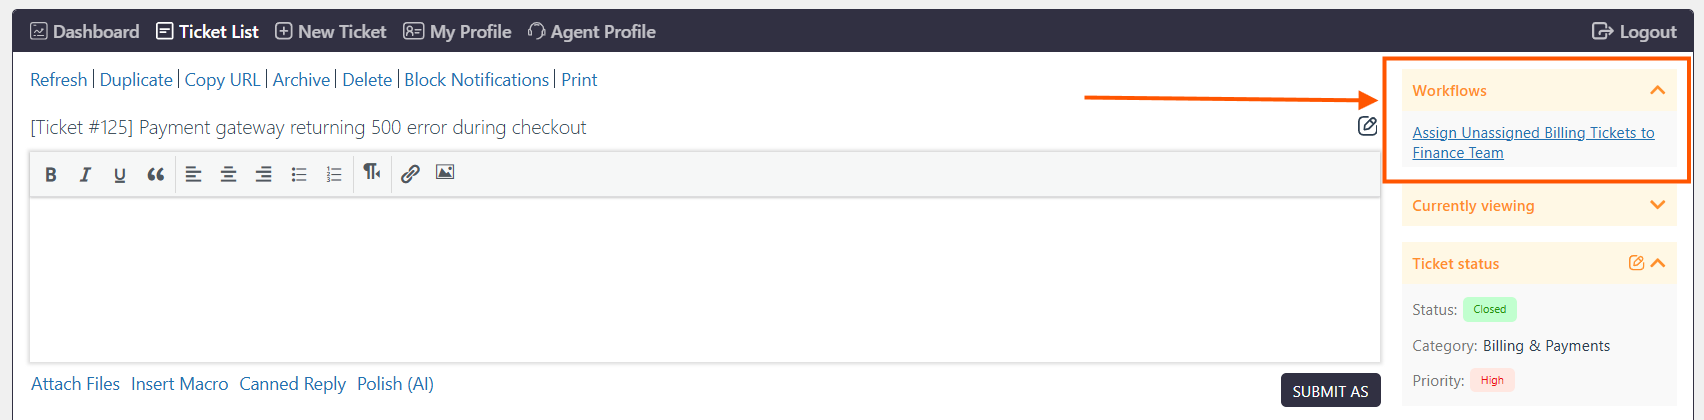
Manual Workflows can be triggered from the Workflow Widget on the individual ticket page.
How It Works
A Manual Workflow works in three steps:
- The Agent selects a workflow from the Workflow Widget.
- The system checks whether the ticket meets the configured conditions.
- If the conditions are satisfied, the configured actions are performed.
Only users with the required Trigger Workflows capability can trigger the workflow.
Step-by-Step Guide
- Go to Support → Workflows → Add Workflow.
- Enter the workflow name and description.
- Configure the required Conditions.
- Configure the required Actions.
- Save the workflow.
- Make sure the required Agent roles have the Trigger Workflows capability.
- Open an individual ticket.
- Open the Workflow Widget.
- Select the required workflow.
- Trigger the workflow.
- The system checks the conditions and performs the configured actions when they are satisfied.
Options / Settings
Conditions
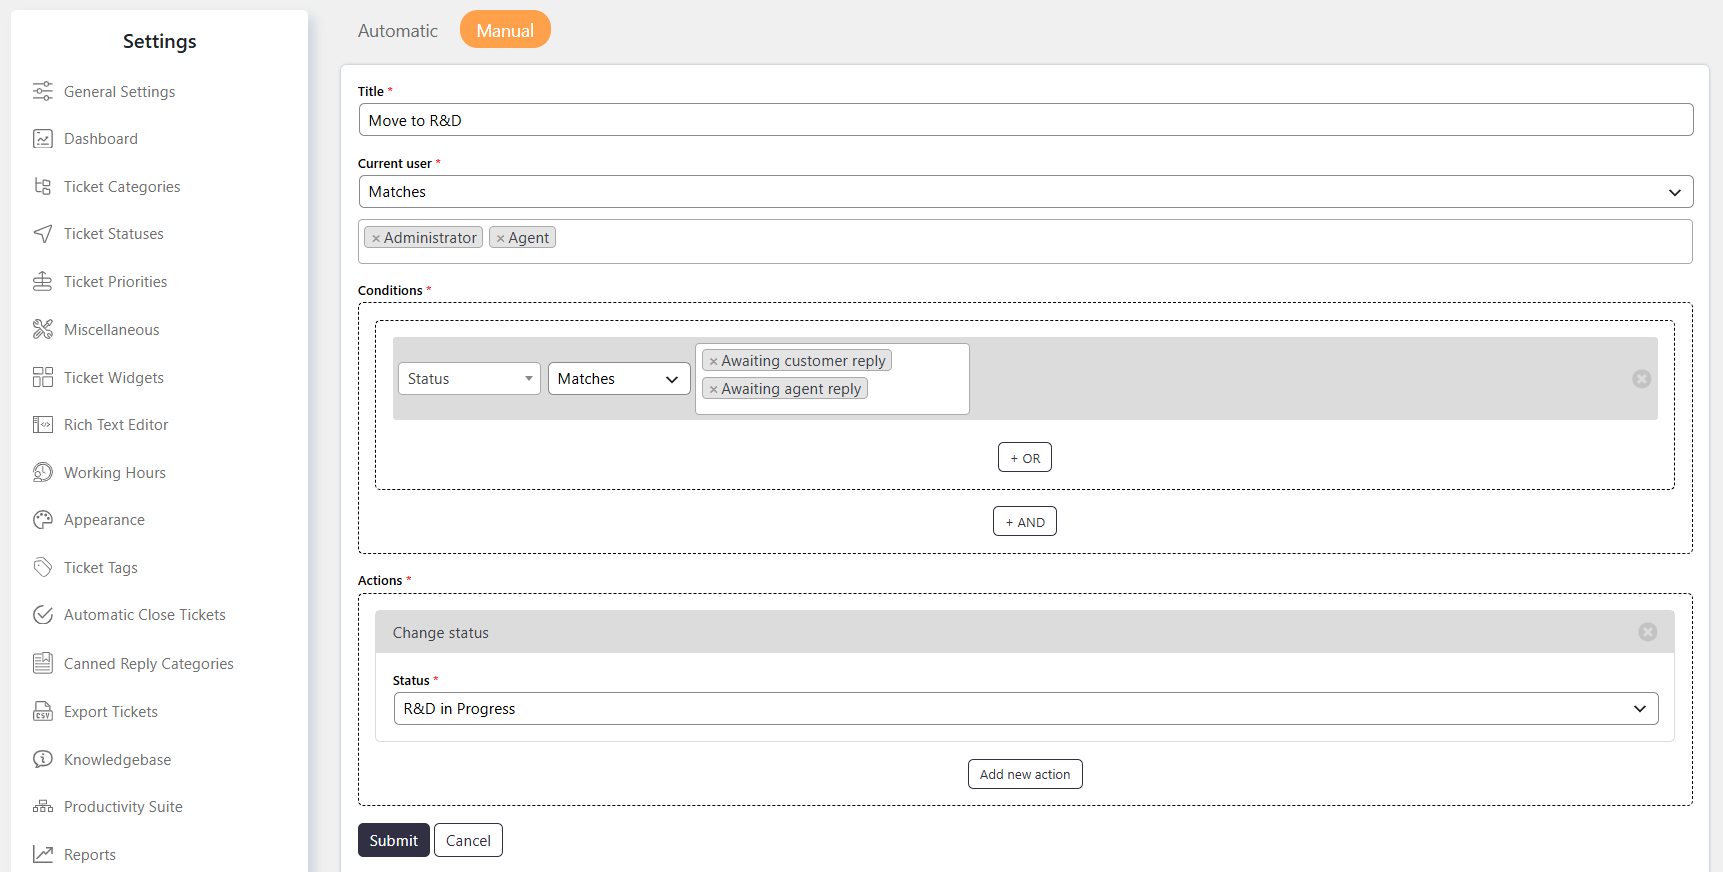
Conditions define the criteria that a ticket must meet before the workflow can perform its actions.
Conditions can use ticket properties and custom fields.
Examples include:
- Status
- Category
- Priority
- Subject
- AgentOnly fields
- Customer fields
- Other ticket-specific custom fields
Common condition operators include:
- Equal to – Matches an exact value.
- Matches – Checks for a partial match.
- Has word – Checks for specific words in text fields.
Actions
Actions define what the workflow does when its conditions are satisfied.
Available actions include:
- Add Reply – Adds a public reply to the ticket.
- Add Private Note – Adds an internal note visible only to Agents.
- Change Subject – Updates the ticket subject.
- Change Status – Changes the ticket status.
- Change Category – Updates the ticket category.
- Change Priority – Changes the ticket priority.
- Change Assignee – Assigns the ticket to an Agent or team.
- Change Additional Recipient – Updates additional recipients.
- Change Ticket Fields – Updates ticket fields.
- Change AgentOnly Fields – Updates fields visible only to Agents.
- Change Customer Fields – Updates customer-related fields.
Trigger Workflows
The Trigger Workflows capability controls which Agents can manually trigger workflows.
Configure this capability from the Agent role settings. The capability can be applied based on ticket access, including Unassigned, Assigned to me, and Assigned to others.
Widget
The Workflow Widget provides access to manual workflows from the individual ticket page.
To enable or disable the widget, go to:
Support → Settings → Ticket Widgets → Workflow
The widget is visible only when at least one Manual Workflow is available.
Trigger Workflow Permission
The Trigger Workflows permission controls whether an agent can manually trigger workflows.
To configure this permission, go to:
Support → Support Agents → Agent Role → Edit → Trigger Workflows
Grant this permission to the required agent roles.
Example
Suppose a ticket has a High priority and needs to be escalated.
You can create a Manual Workflow with:
Condition: Priority is equal to High
Actions:
- Assign the ticket to the Senior Support Team.
- Change the status to In Progress.
- Add a Private Note for internal communication.
When an authorized Agent triggers the workflow, the system checks the priority and performs these actions if the condition is satisfied.
Notes / Tips
- Manual Workflows are triggered by users; they do not run automatically.
- Use Conditions to control when a workflow can be executed.
- Use multiple Actions when several ticket updates are required.
- Ensure Agents have the Trigger Workflows capability before expecting them to use Manual Workflows.
- The Workflow Widget provides access to available Manual Workflows from the individual ticket page.