
Overview
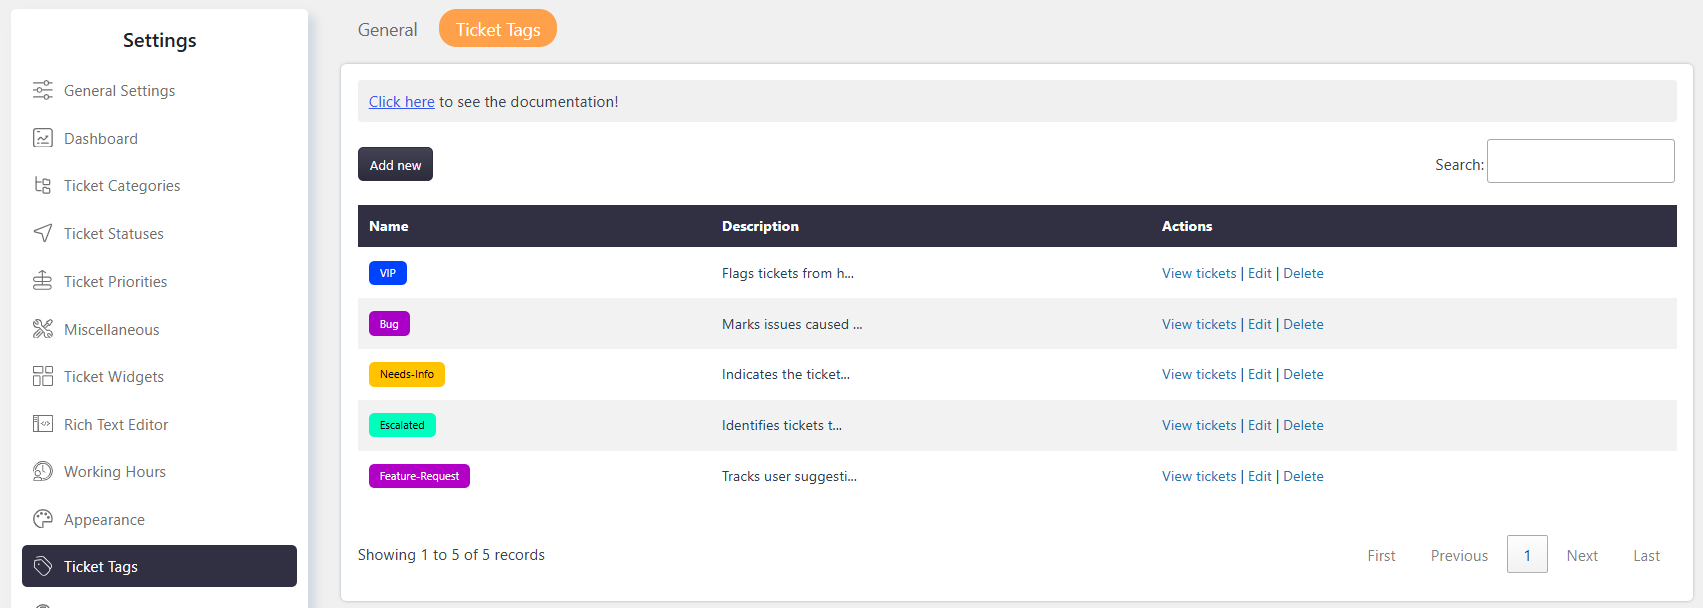
The Tags section allows administrators to manage tags used to organize and categorize tickets.
You can create, edit, and delete tags. You can also view all tickets associated with a specific tag.
Where to Find
Go to Support → Settings → Ticket Tags.
How It Works
Tags help organize tickets and make related tickets easier to identify.
Administrators can manage tags from the Ticket Tags page. Agents can modify tags on tickets when their role has the Modify Tags capability.
Step-by-Step Guide
Add New Tag
- Go to Support → Settings → Ticket Tags.
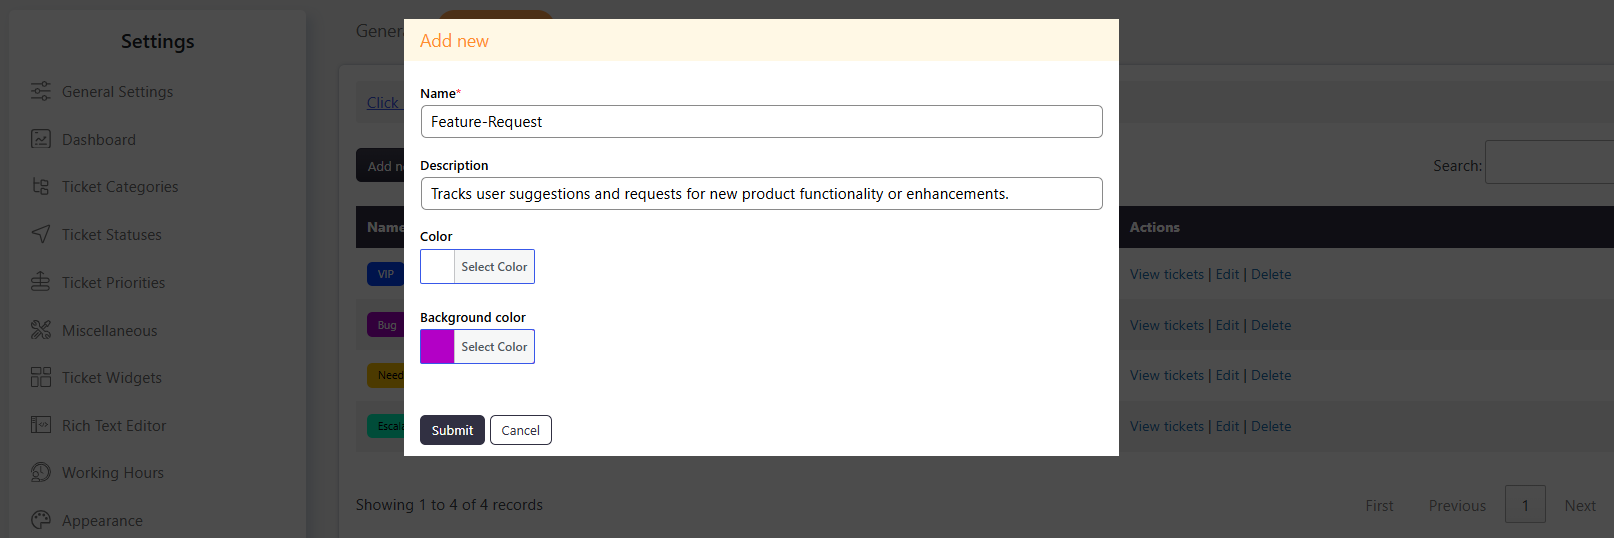
- Click Add New.
- Enter a name for the tag.
- Enter an optional description.
- Select the background and text color.
- Click Submit to create the tag.
Edit Tag
- Go to Support → Settings → Ticket Tags.
- Find the tag you want to update.
- Click Edit.
- Update the tag name, description, or colors.
- Click Submit to save the changes.
Delete Tag
- Go to Support → Settings → Ticket Tags.
- Find the tag you want to remove.
- Click Delete.
- Confirm the deletion when prompted.
- Deleting tags will remove tags from respected tickets also.
View Tickets
- Go to Support → Settings → Ticket Tags.
- Find the required tag (eg. VIP).
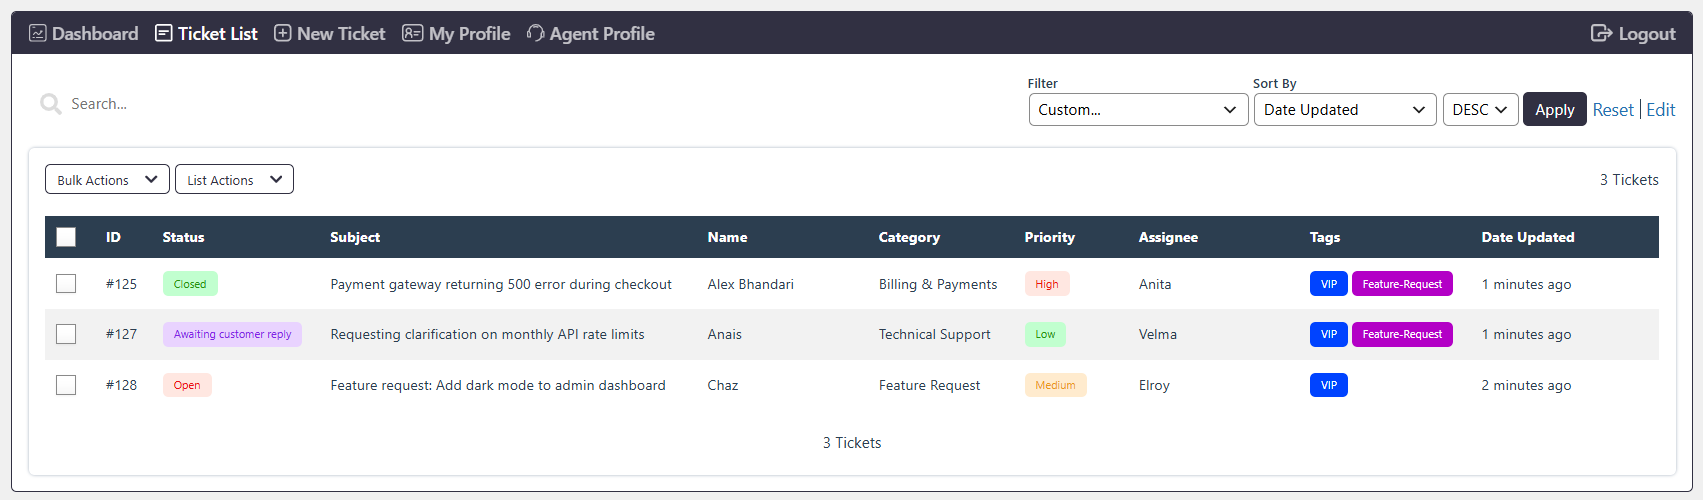
- Click View Tickets.
- The system displays tickets associated with that tag (VIP).
Important: The Tags filter must be added to the Ticket List for the View Tickets link to work correctly. If the Tags filter is not available, the tickets may not be filtered correctly.
Notes / Tips
- Use clear and meaningful tag names to make tickets easier to organize.
- Use tag colors to visually distinguish different types of tickets.
- The Modify Tags capability controls whether an Agent can modify tags on tickets.
- Deleting a tag removes the tag from the available tag list.