Overview
The Checklist feature allows Admin users to create task lists and assign them to tickets. Agents can mark tasks as completed while working on a ticket. This helps teams follow required steps and track completed tasks.
Where to Find
- Enable the feature from Support → Settings → Productivity Suite → Checklist.
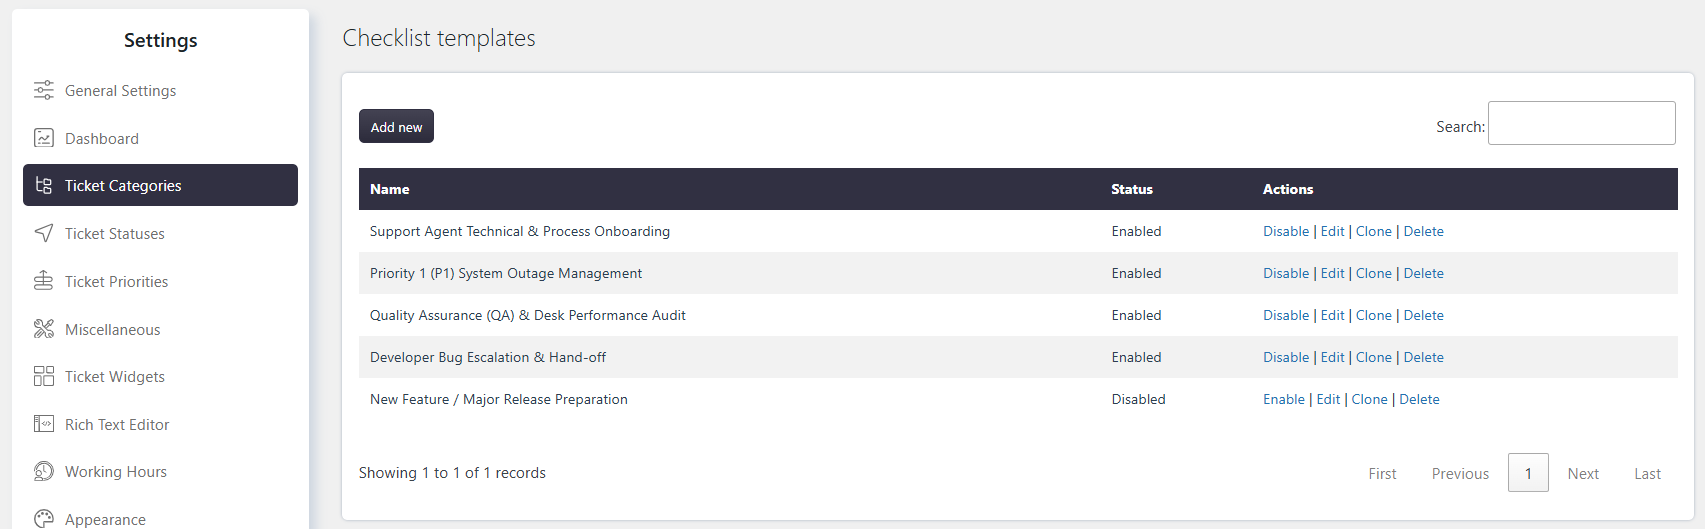
- Manage checklist templates from Support → Settings → Checklist Templates.
- Manage the checklist widget from Support → Settings → Ticket Widgets → Checklist.
How It Works
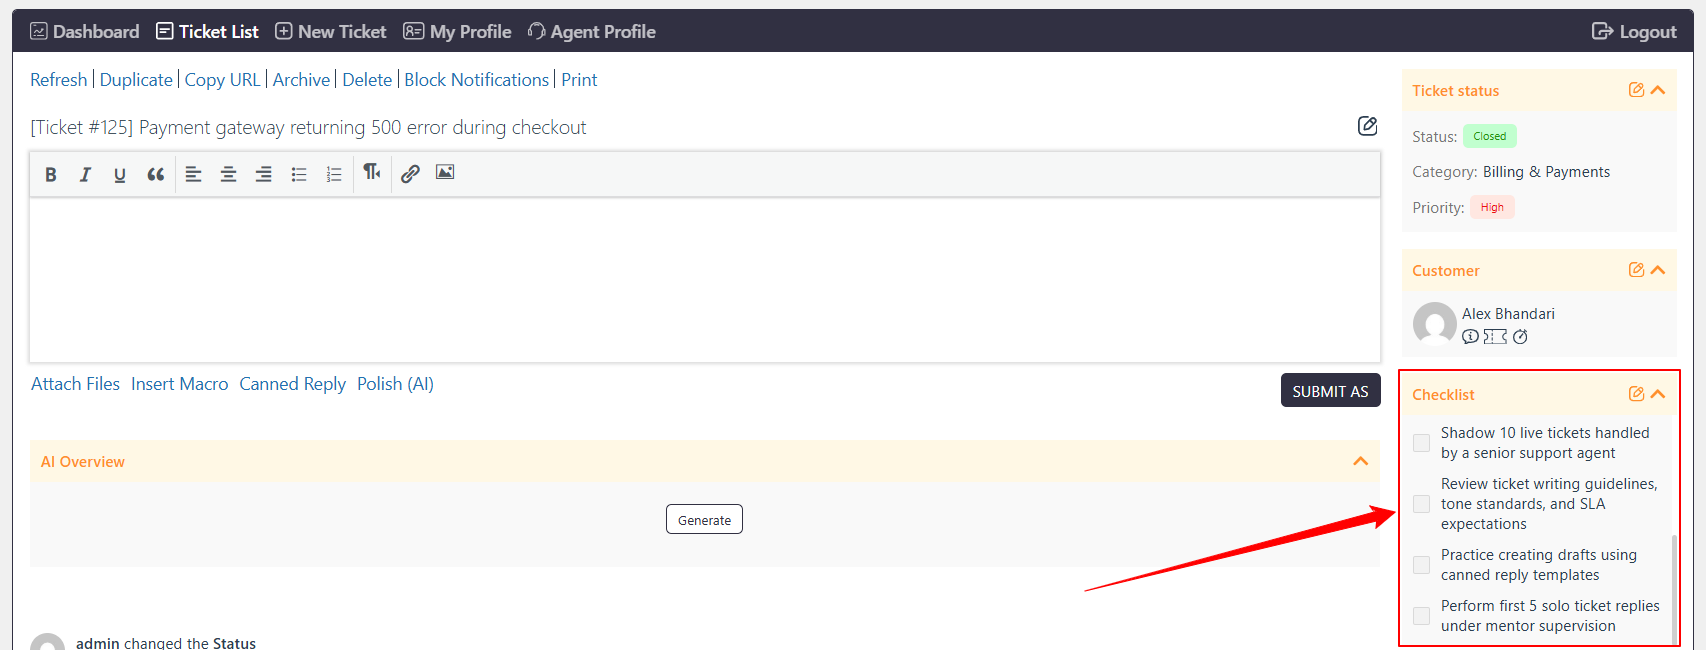
A checklist contains a set of tasks that Agents can complete while handling a ticket. Admin users can create checklist templates and Agents can assign them to tickets through the Checklist Widget.
Once assigned, Agents can mark individual tasks as completed as they work through the ticket.
Step-by-Step Guide
Enable Checklist
- Go to Support → Settings → Productivity Suite → Checklist.
- Enable the Checklist feature.
- Save the settings.
Create or Manage Checklist Templates
- Go to Support → Settings → Checklist Templates.
- Create a new checklist or edit an existing checklist.
- Add the required tasks to the checklist.
- Save the checklist.
Enable the Checklist Widget
- Go to Support → Settings → Ticket Widgets → Checklist.
- Enable the Checklist widget.
- Configure the required permissions.
- Save the settings.
Assign a Checklist to a Ticket
- Open the required ticket.
- Go to the Checklist Widget.
- Select the required checklist.
- Assign the checklist to the ticket.
- Mark each task as completed when it is finished.
Permissions
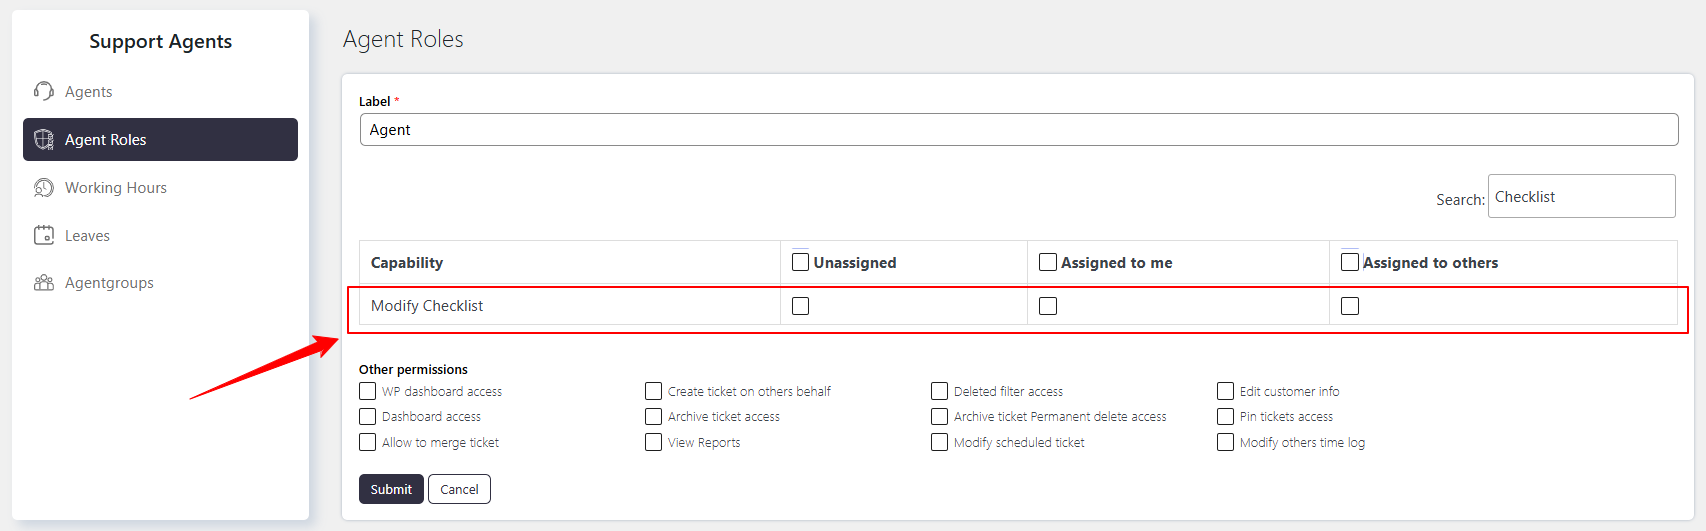
Admin users can control which Agent roles can assign checklists or create new checklists.
To manage these permissions:
- Go to Support → Support Agents → Agent Roles.
- Select the required Agent role and click Edit.
- Configure the Modify Checklist permission.
- Save the changes.