
Overview
Allow Agents and Customers to save frequently used ticket filter settings.
Saved filters are useful when you regularly need to view tickets using the same criteria. Instead of creating the filter again, you can apply a saved filter with a single click.
Custom Filters
When the available Default Filters do not meet your requirements, you can create a custom filter.
For example, you can create a filter to view tickets with the Marketing category and High priority.
Custom filters are temporary. If you need to use the same criteria again, you must recreate the filter unless you save it.
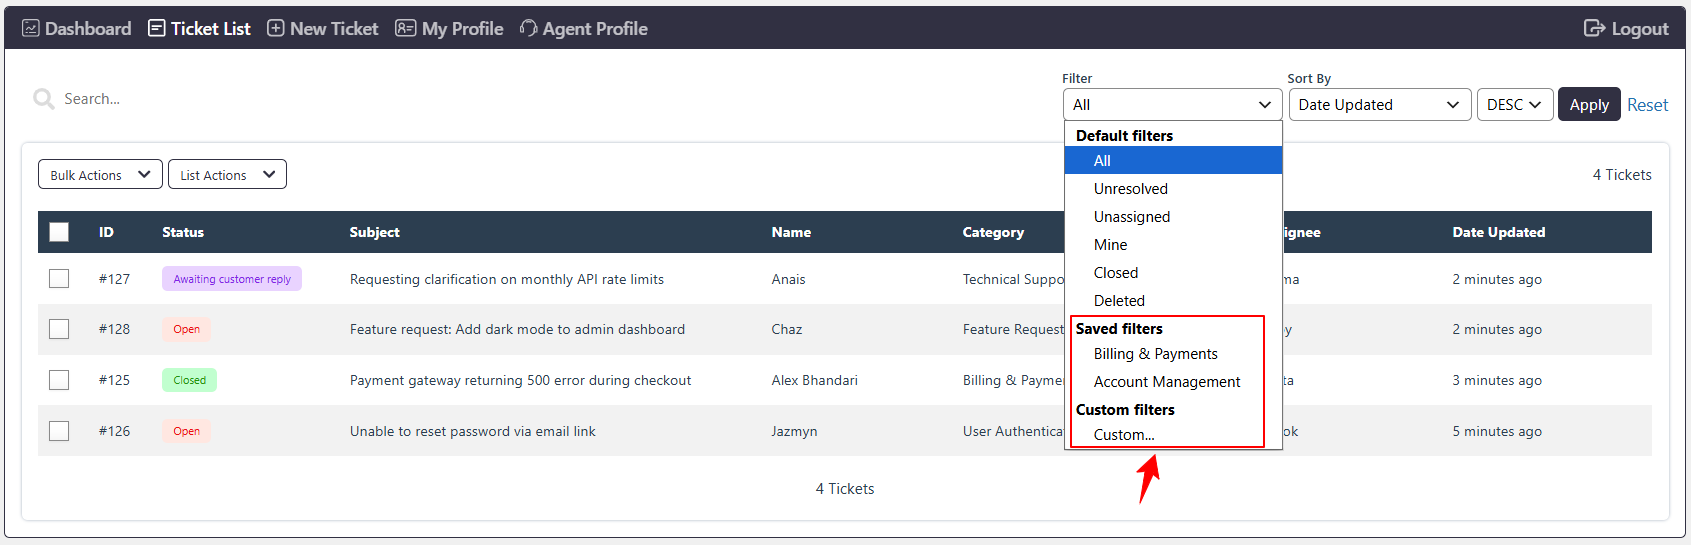
Add a Custom Filter
- Go to Support → Tickets → Filter → Custom filter → Custom.
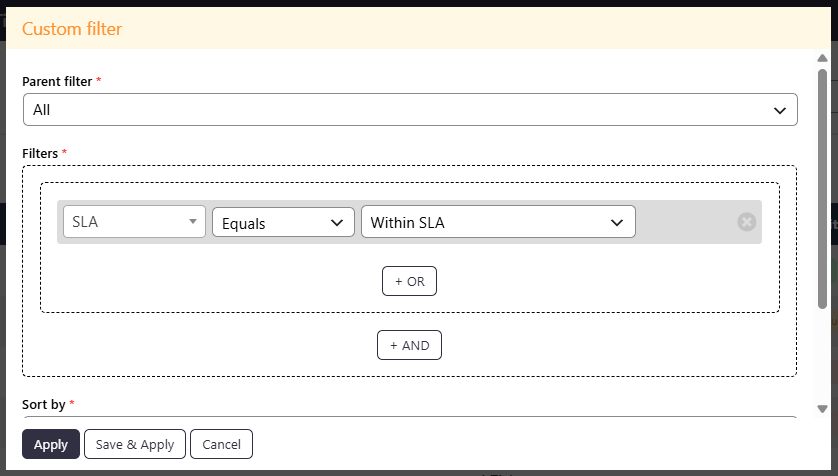
- Select a Parent Filter from the available default filters.
- Add the required filter conditions, such as Category or Priority.
- Select the required Sort By option.
- Select the required Sort Order.
- Click Apply to view the filtered tickets or click Save & Apply to save this filter for future use and view the filtered tickets.
How Saved Filters Work
Default Filters and Saved Filters serve different purposes:
- Default Filters are configured by the administrator and are available to users based on their view.
- Saved Filters are created by individual users and are available only to the user who created them. Saved filters retain the selected filter conditions, sorting options, and other filter settings.
Manage Saved Filters
Users can manage their own saved filters based on their requirements.
Available actions include:
- Add – Create a new saved filter.
- Edit – Update an existing saved filter.
- Delete – Remove a saved filter that is no longer required.
Saved filters help users quickly access frequently used ticket views without recreating the same filter criteria each time.